





Logos, photographs and all-over patterns on umbrellas can be produced in several ways. Screen printing uses a mesh stencil; digital inkjet printing uses printheads controlled by a digital file. Heat transfer moves a design from a carrier onto fabric using heat. These terms describe different parts of the process, so one printing specification may involve both digital printing and heat transfer.
Buyers and designers need to specify more than the printing method. The actual fabric, artwork dimensions, print position and appearance on the finished umbrella all matter. Use digital proofs to check layout and physical samples to confirm colour and detail. Designs that span panels also need to be checked across seams on an open umbrella.
1. How screen printing, digital printing and heat transfer work
Screen printing: ink passes through a mesh stencil
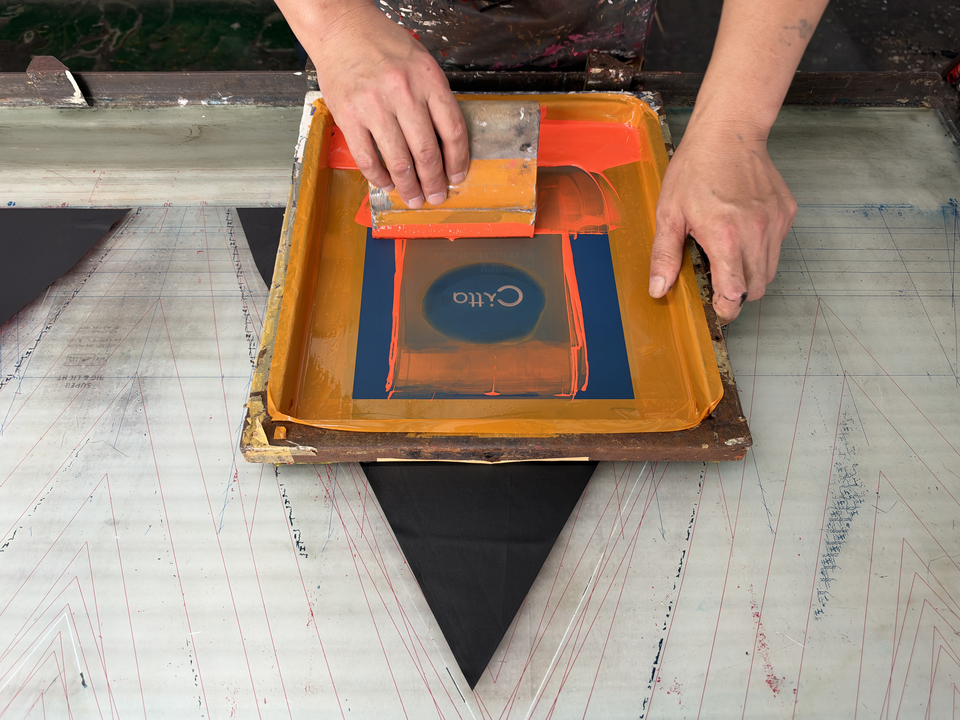
A screen has open areas that allow ink through and blocked areas that prevent it from passing. A squeegee pushes ink through the open mesh onto the material to form the design.[1] The clarity of logo edges, fine lines and lettering depends on the screen, ink, fabric and actual print size.
Screen printing is not limited to solid-colour artwork. Halftones use dots of varying size or spacing to reproduce tonal changes. SAATI also lists fine-line and halftone applications for its rotary textile screen materials.[5][13] Screen printing can therefore reproduce tonal detail, but the detail retained on a particular umbrella still needs to be assessed using the proposed process and a printed sample.
Digital printing: printheads follow a digital artwork file
Digital inkjet printing uses a digital file to control printheads that deposit ink onto fabric or a transfer carrier. Epson describes several textile-printing routes, including direct-to-fabric printing and sublimation through transfer paper.[2] A specification that says only “digital printing” does not establish whether the umbrella fabric is printed directly, which ink is used or whether heat transfer is involved.
Heat transfer and sublimation describe different things
Heat transfer uses a carrier, such as paper or film, and heat to move a design onto the receiving material. In a common transfer-sublimation route, the design is first printed onto transfer paper. Heating then allows the dye to enter a compatible polyester material in its gaseous state and colour it. Sublimation dye produces the colour; this differs from transfers that rely on hot-melt adhesive to attach the design.[2][4]
Sublimation can also use a direct-print route. Mimaki’s direct-sublimation ink information explicitly describes printing without transfer paper.[3] Adhesive-based transfers use a different material system: DTFilm, for example, prints onto film, adds hot-melt adhesive powder and then uses a heat press to transfer the design to fabric.[4] Heat transfer is therefore not always sublimation, and “digital” alone does not identify the complete route.
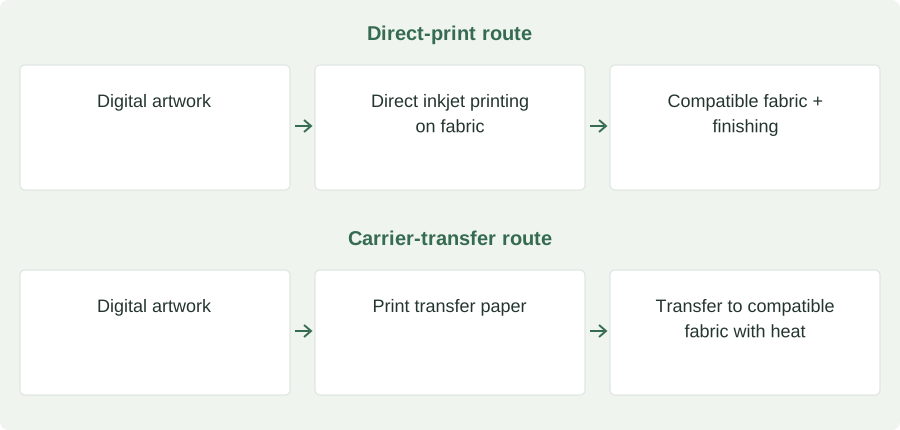
Alongside the process name, specify where the design is printed, which materials are used and how the design is fixed to the actual fabric. Heating conditions, coating compatibility and any finishing requirements depend on the selected printing system.
2. How the artwork, background colour and fabric affect the choice
A white logo, a gradient and a photograph covering the canopy make different demands on a print. A white logo needs suitable opacity and clean edges; a gradient needs smooth tonal transitions; a photograph needs its important details to remain clear at the final size. Describing those requirements makes sample assessment more useful than asking only for “full colour” or “high definition”.
| Artwork requirement | What to check on a sample |
|---|---|
| Solid-colour logos, small lettering and fine lines | Check opacity, edges, spaces within lettering and line definition on the actual background colour. Do not rely on an enlarged screen image. |
| Gradients and photographs | Check tonal range, adjacent colours and important details at the intended print size. |
| All-over and cross-panel designs | Mark the coverage and seam crossings. Check orientation after assembly and whether seams interrupt important elements. |
| Different designs inside and outside | Supply the artwork, orientation and colour requirements for each side, and inspect both sides separately. |
Sampling also requires the fabric’s fibre composition, background colour, coating and other finishes. Epson describes transfer sublimation as a method commonly used on white or light-coloured fabrics with a high polyester content. Siser offers specific adhesive-transfer materials for nylon and certain treated fabrics.[2][6] These are different material systems; neither establishes that one printing method suits every umbrella fabric.
Terms such as PG, 190T, 260T and black coating refer to a trade description, specification or finish. They do not fully describe the substrate conditions needed for printing. Even fabrics labelled polyester need their actual background colour, coating and process compatibility checked. For these fabric specifications, see Umbrella Fabric Explained: Denier, Thread Density and GSM.[12]
Use the fabric and colour intended for the order when making the sample. If the fabric, background colour or coating changes, or the artwork size changes substantially, recheck the affected print characteristics. A print on another material cannot replace approval of the specified order configuration.
3. Two illustrated printing sequences: artwork, production and finished products
The screen-printing material shows the screen, the squeegee pass and the printed panel. The sequence using digitally printed transfer paper shows paper printing, feeding, paper–fabric separation and the printed fabric. The finished-product images help show the layout on the complete umbrella and sleeve. For a particular project, match the artwork, process records and finished product to the actual model, approved revision and sample records.[14]
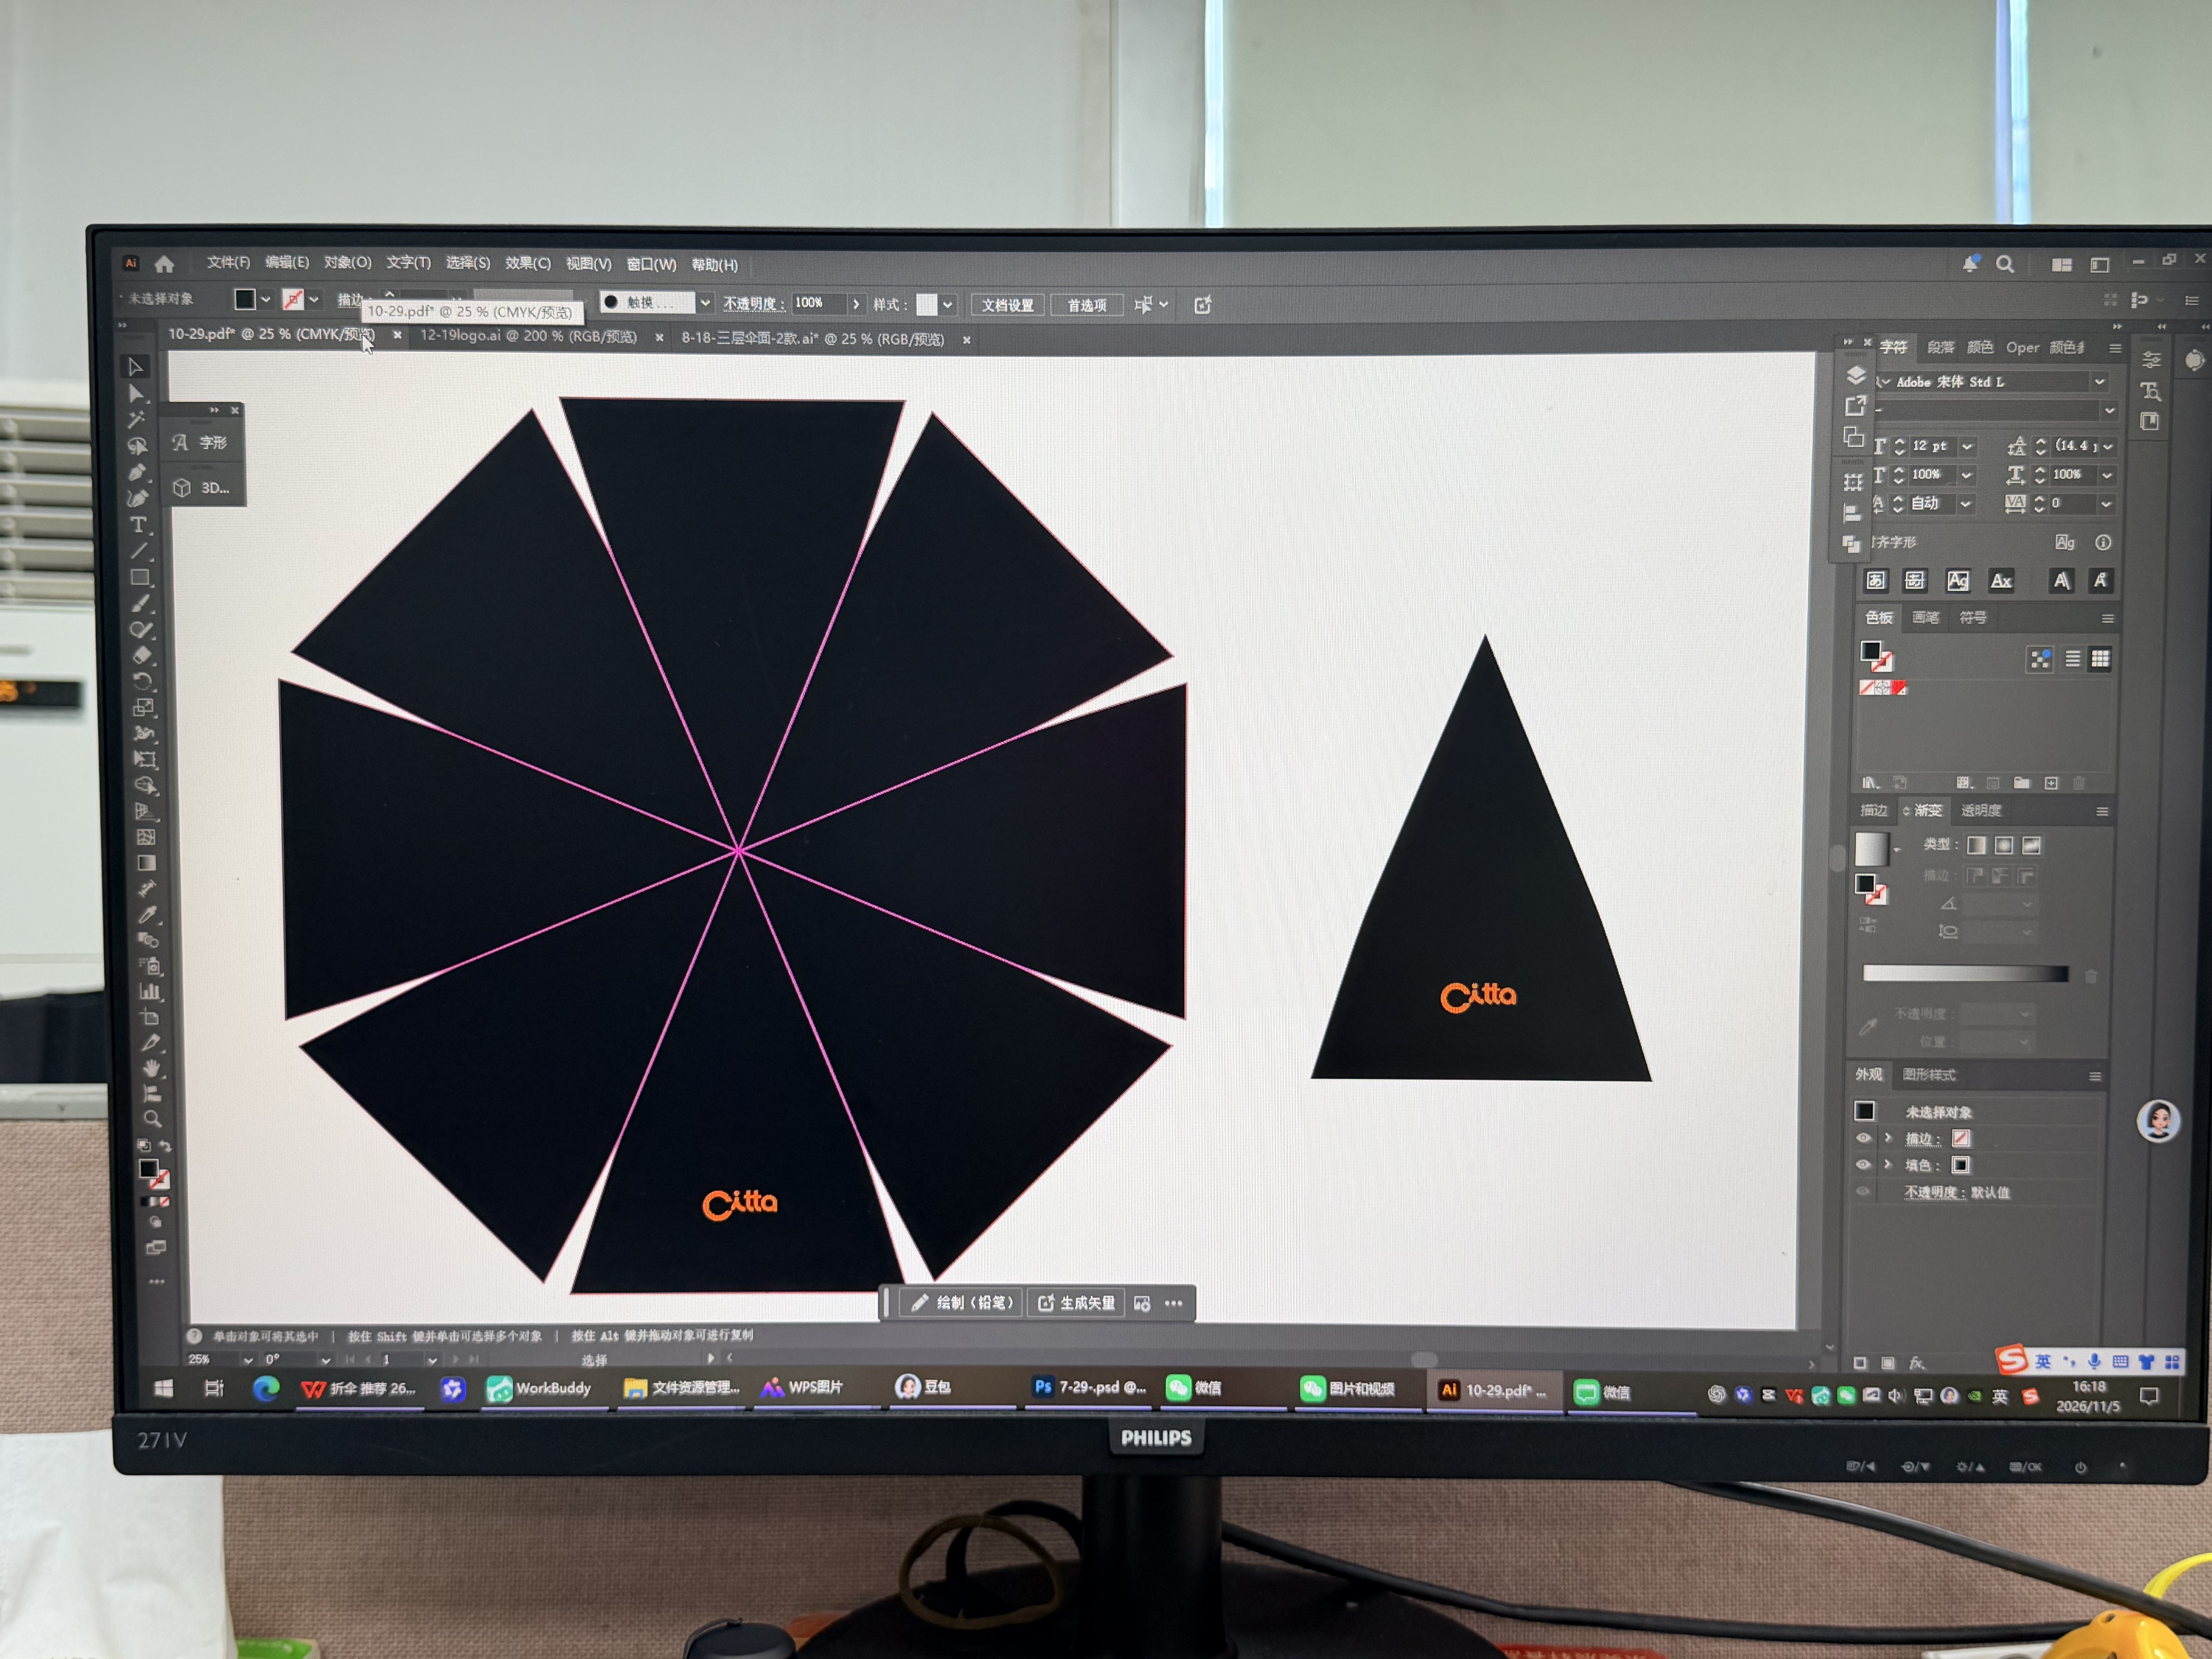
Screen printing · 01 Position the logo in the artwork
The artwork screen places the Citta logo within one triangular panel and shows its position on the full canopy. Check the logo’s size, orientation and relationship to the canopy edge.[14]
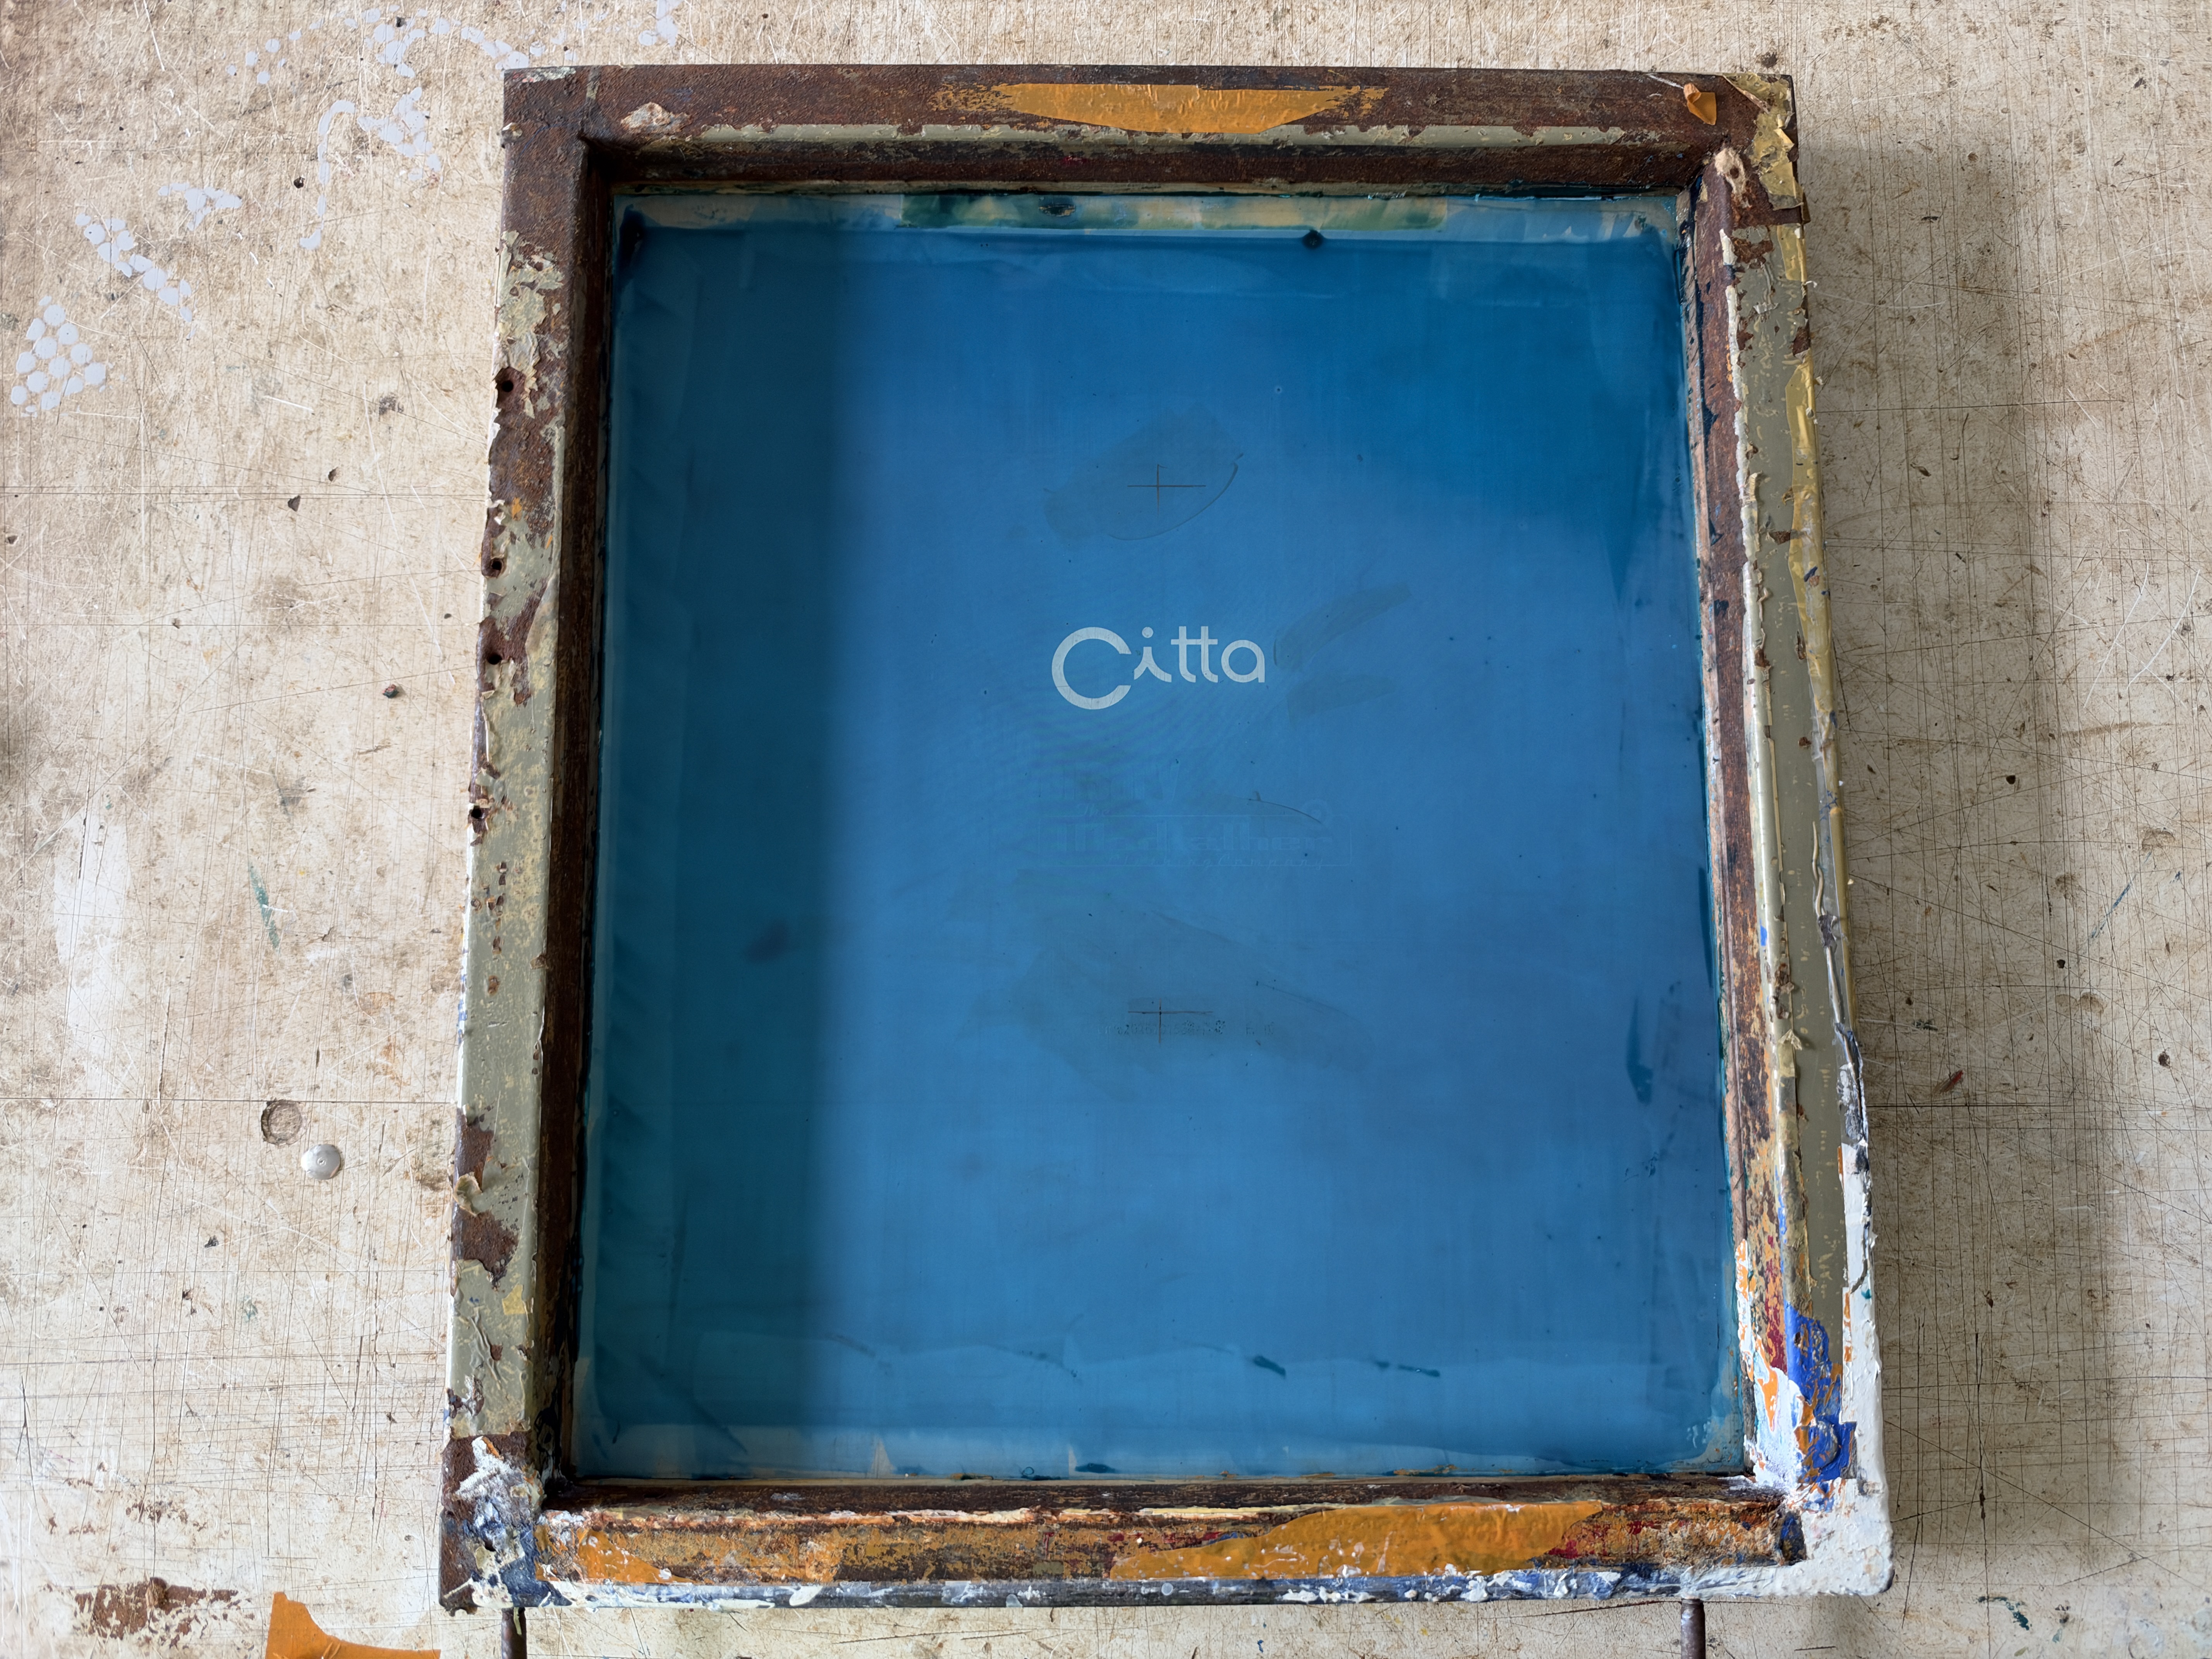
Screen printing · 02 Examine the screen image
The Citta lettering is visible in the centre of the screen, with registration marks around it. During printing, the image area allows ink through while the blocked areas hold it back.[14]
Screen printing · 03 Arrange panels on the worktable
Black triangular panels lie along a long worktable. The operator places the screen frame over the intended print position. The wider view shows how the panel, screen and table are arranged.[14]
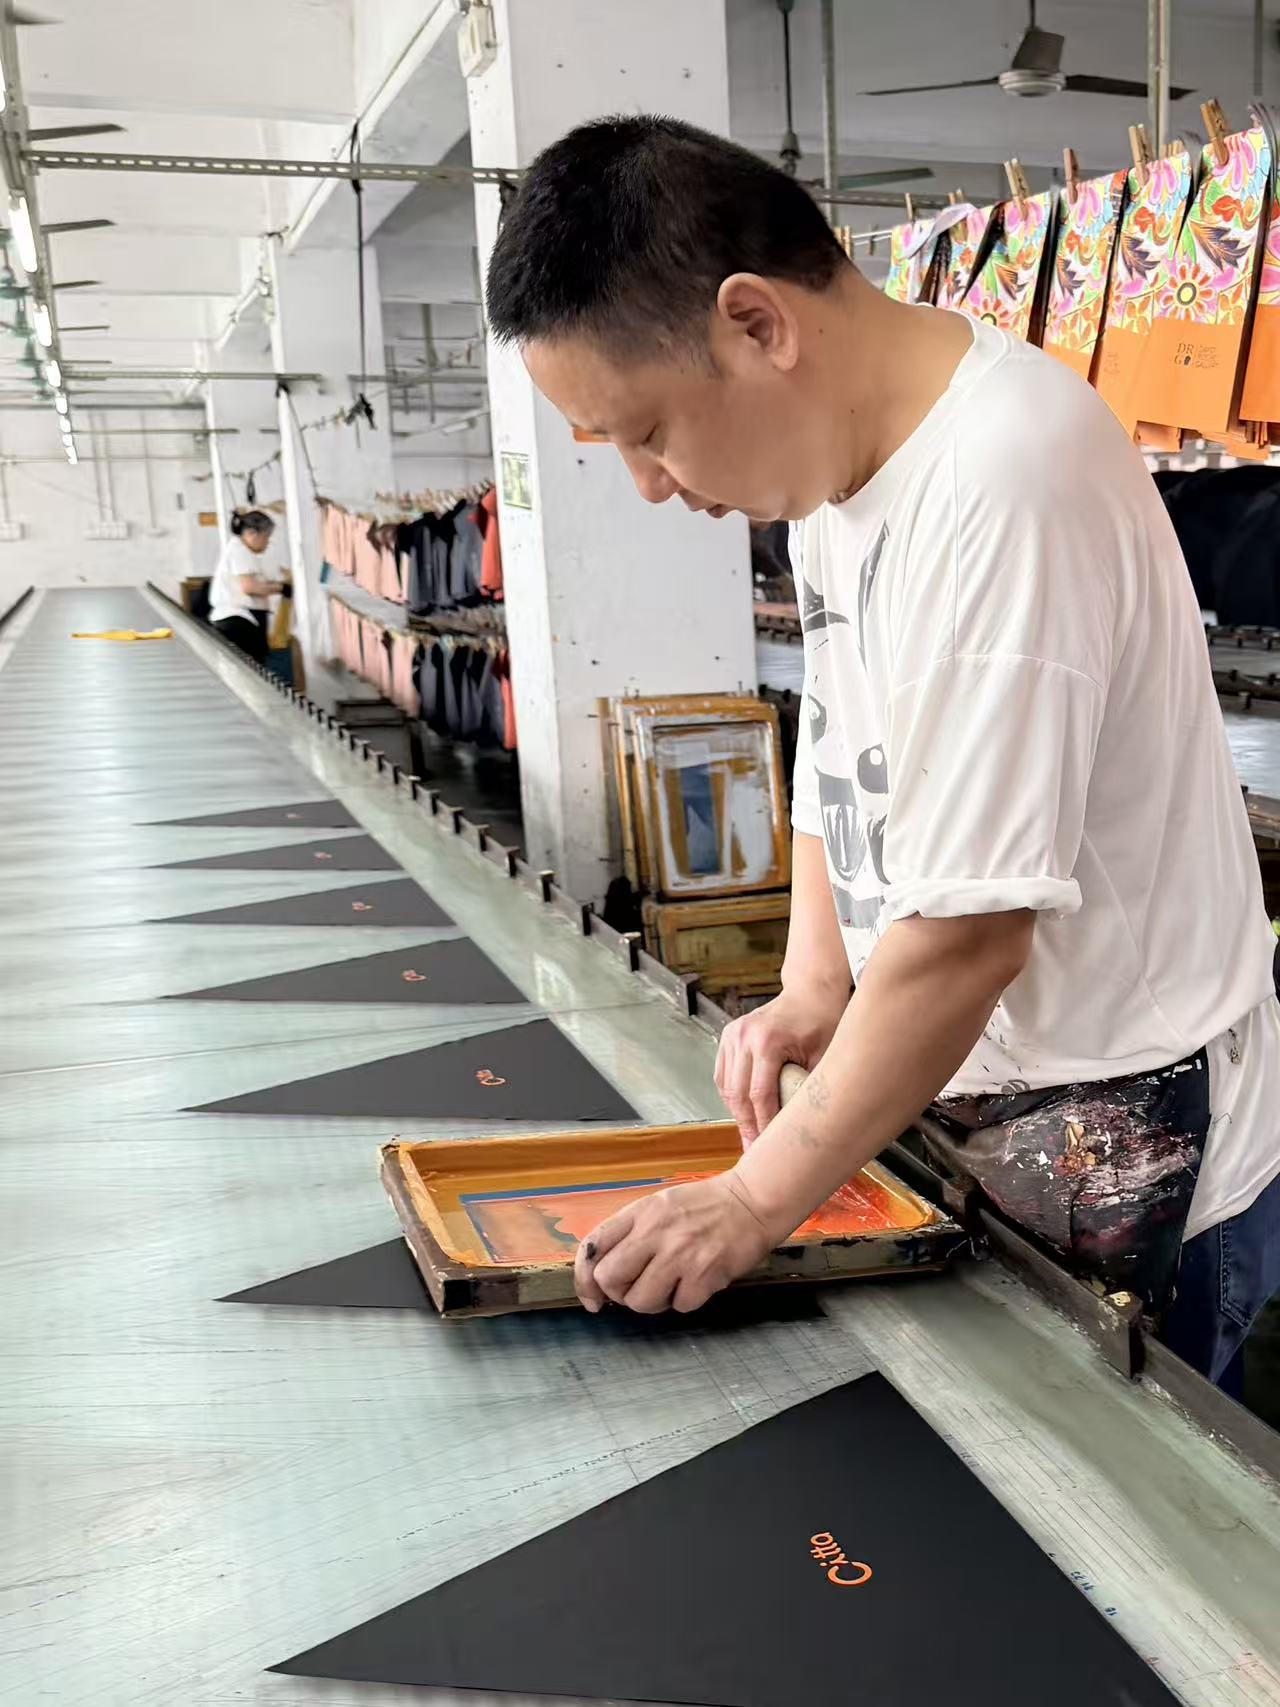 Worktable and printing area
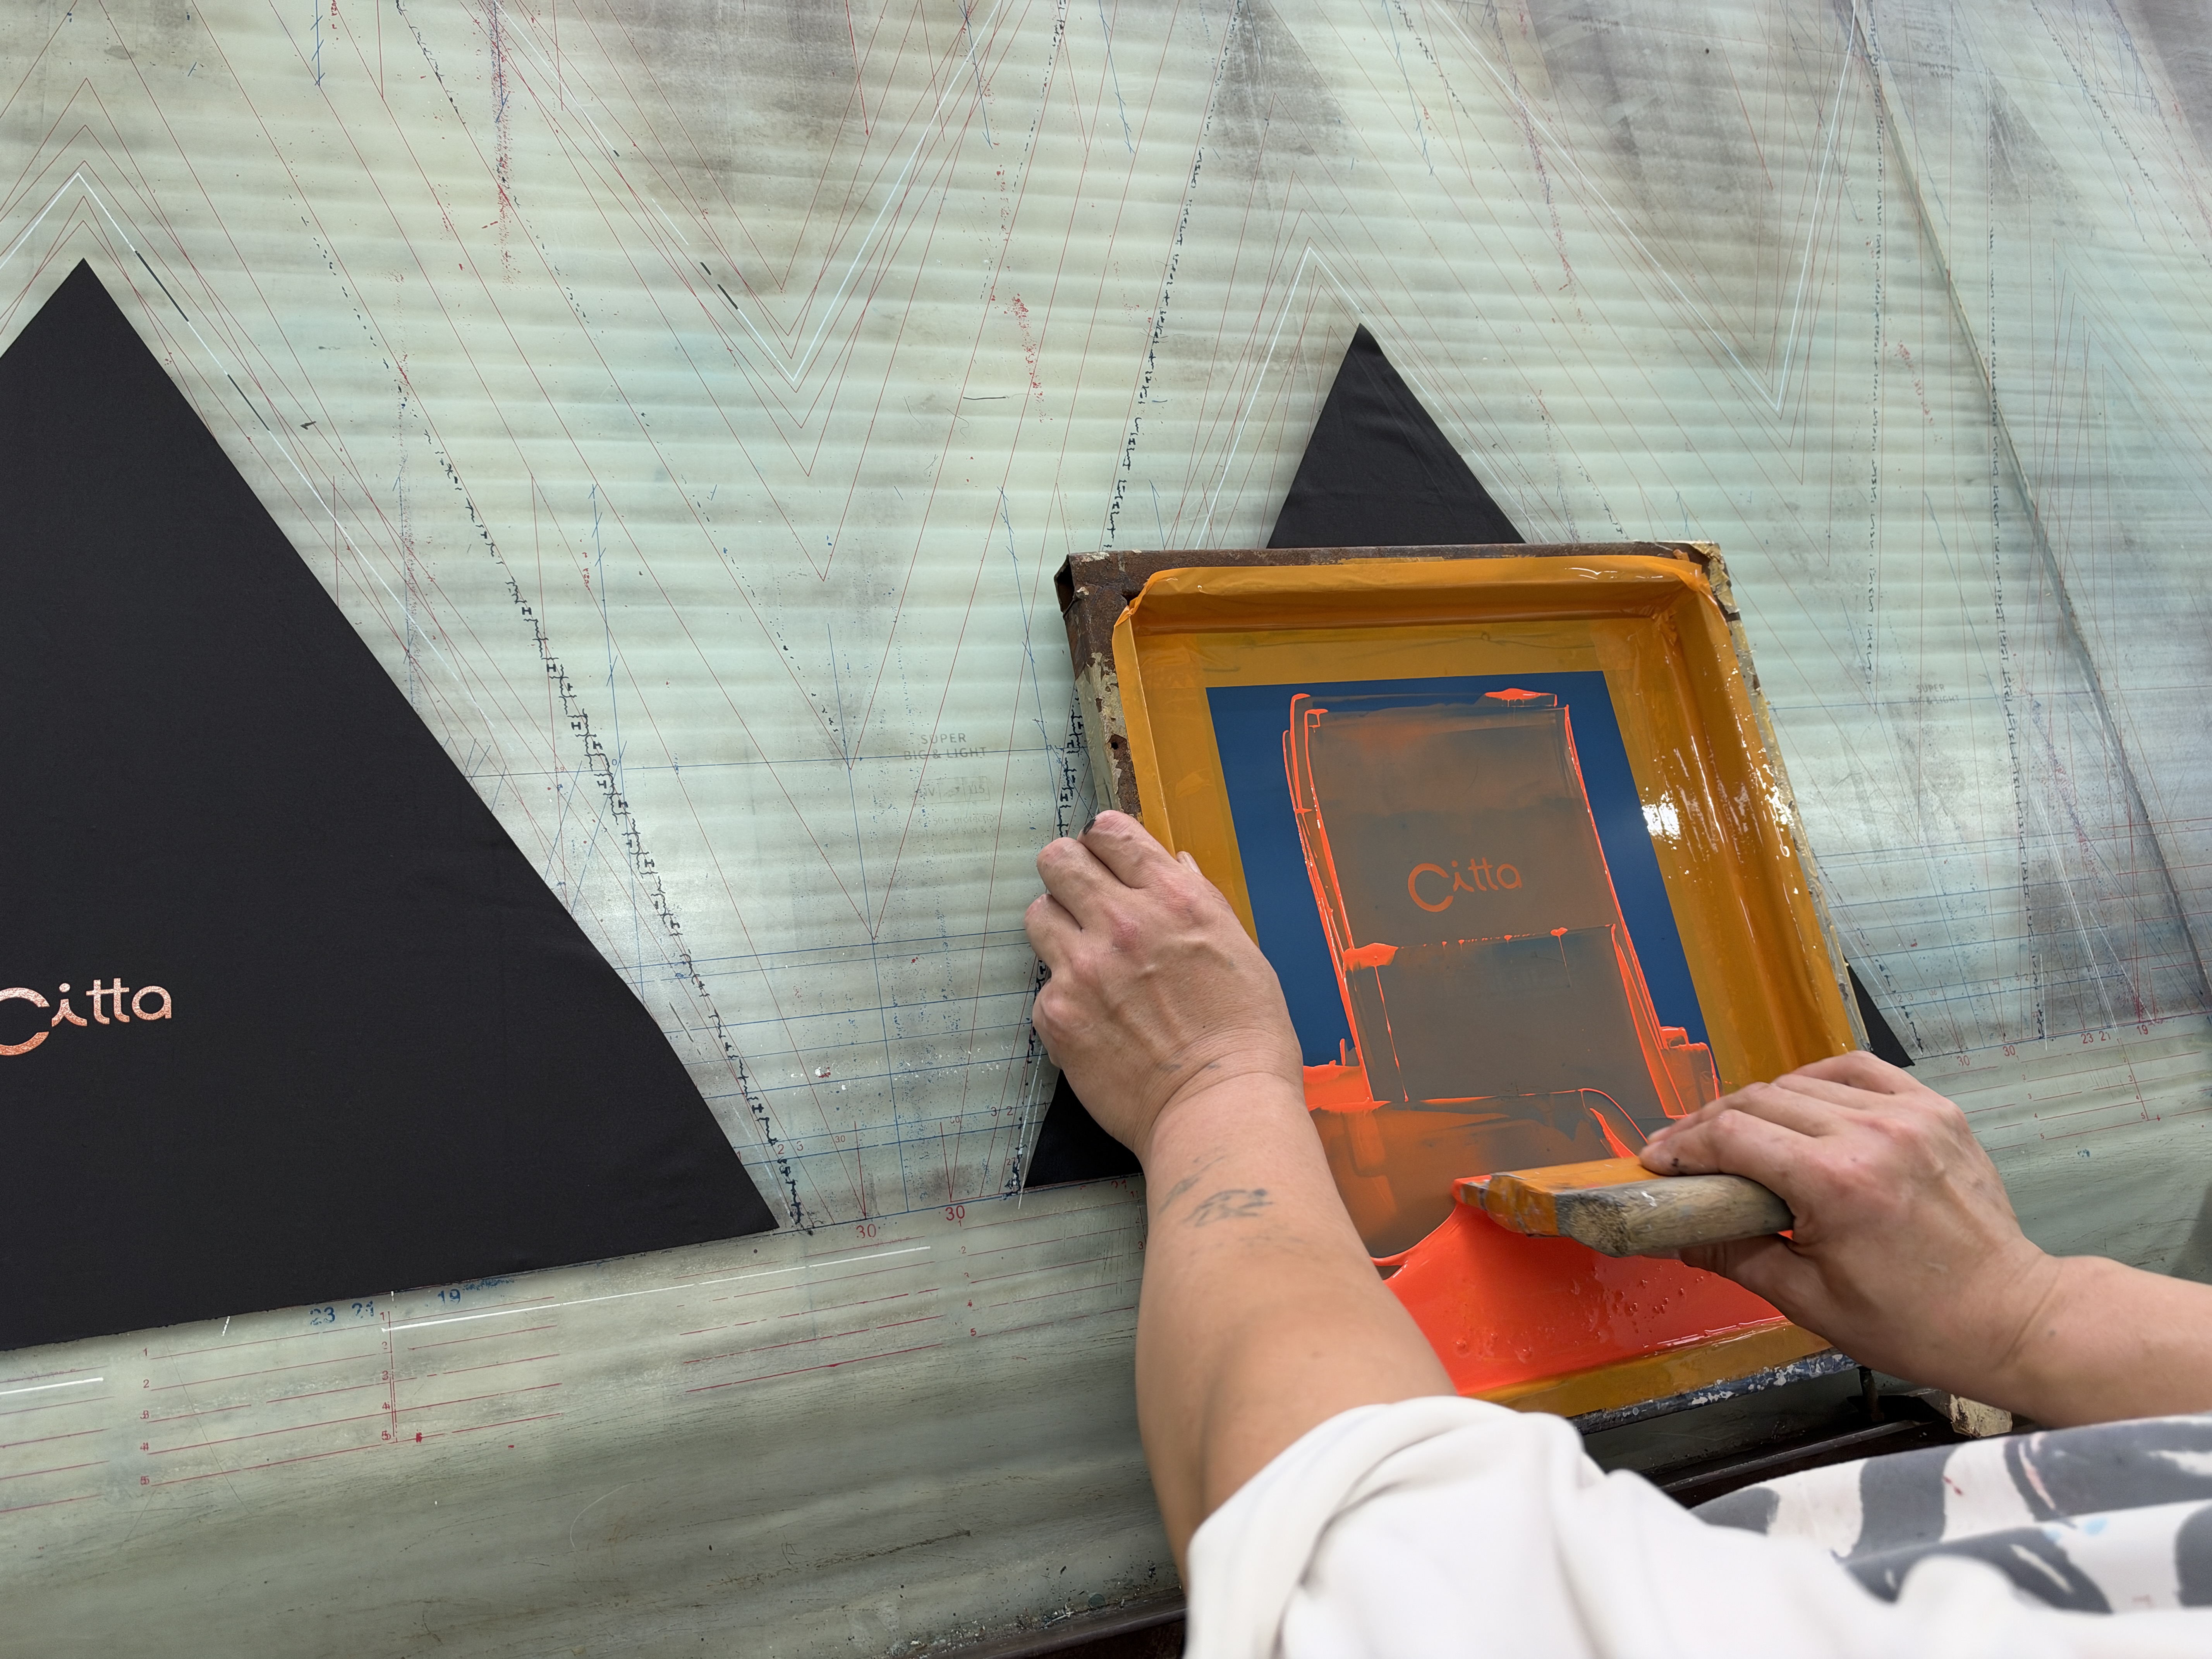 Close view of the screen, panel and operation
Screen printing · 04 Print the logo with a squeegee
The operator holds the frame and moves a squeegee across the mesh, pushing the orange ink. The ink passes through the image area onto the black panel beneath it.[14]
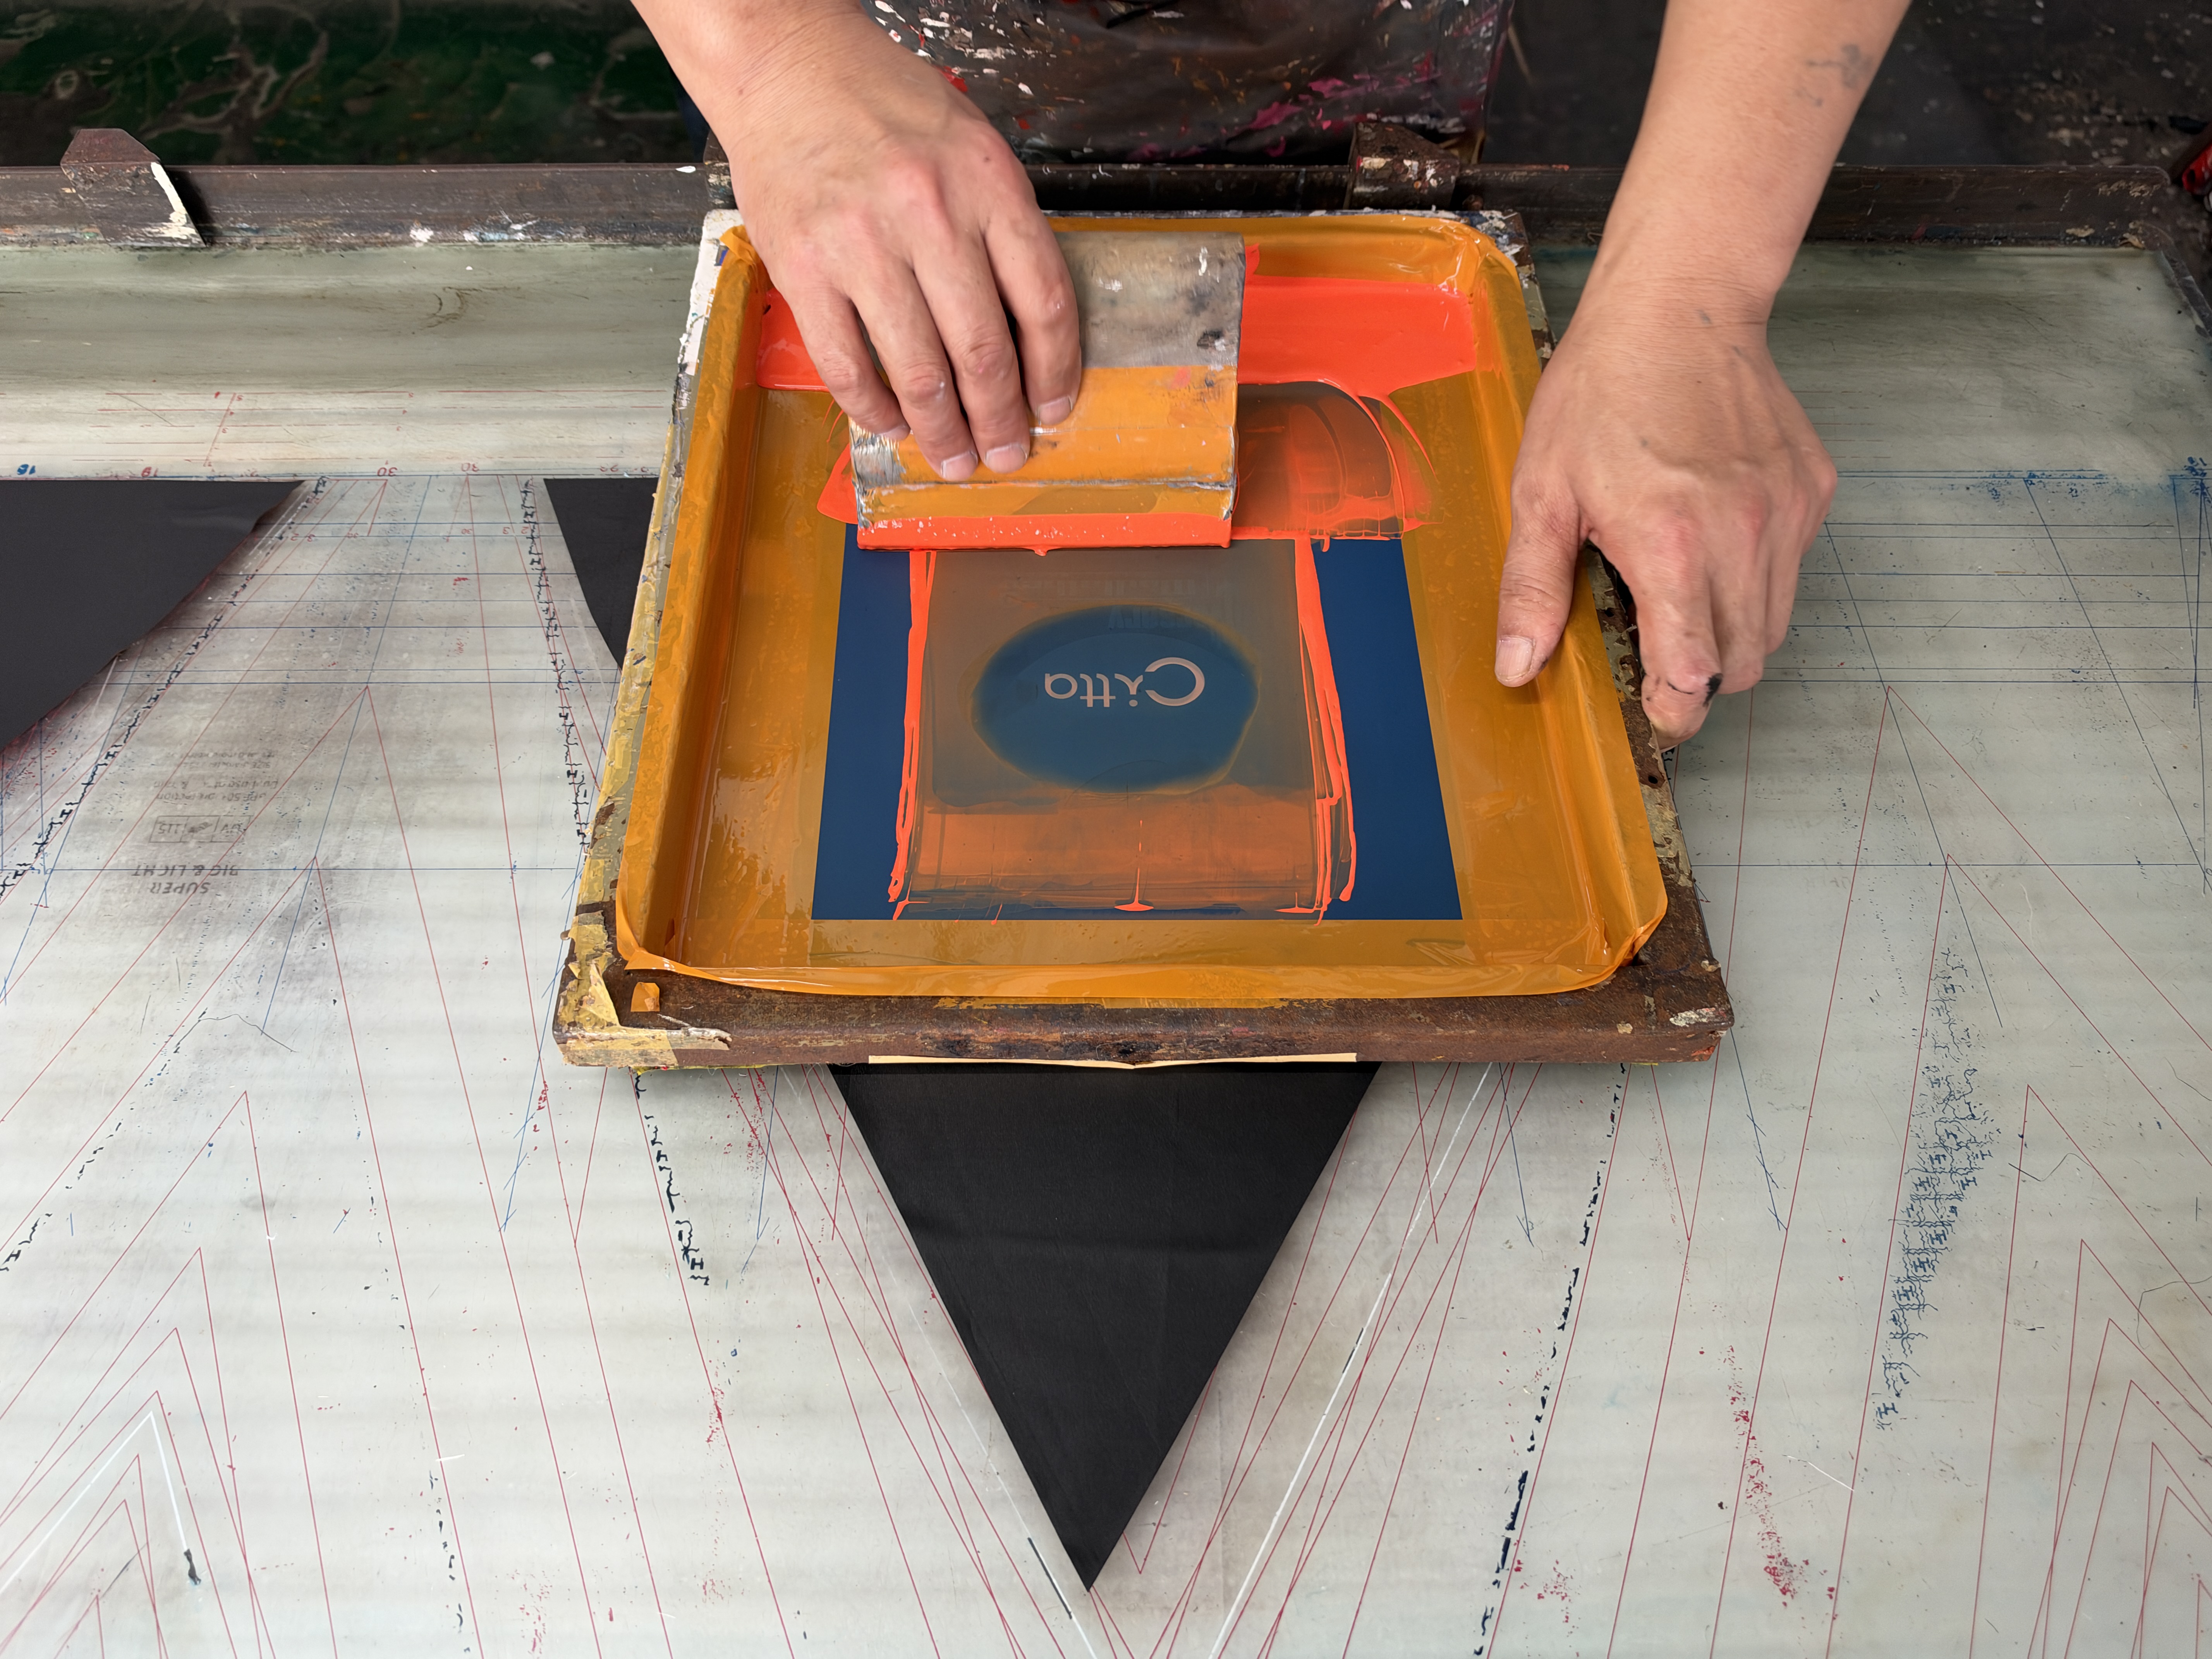
 Original video
Screen printing · 05 Examine the printed panel
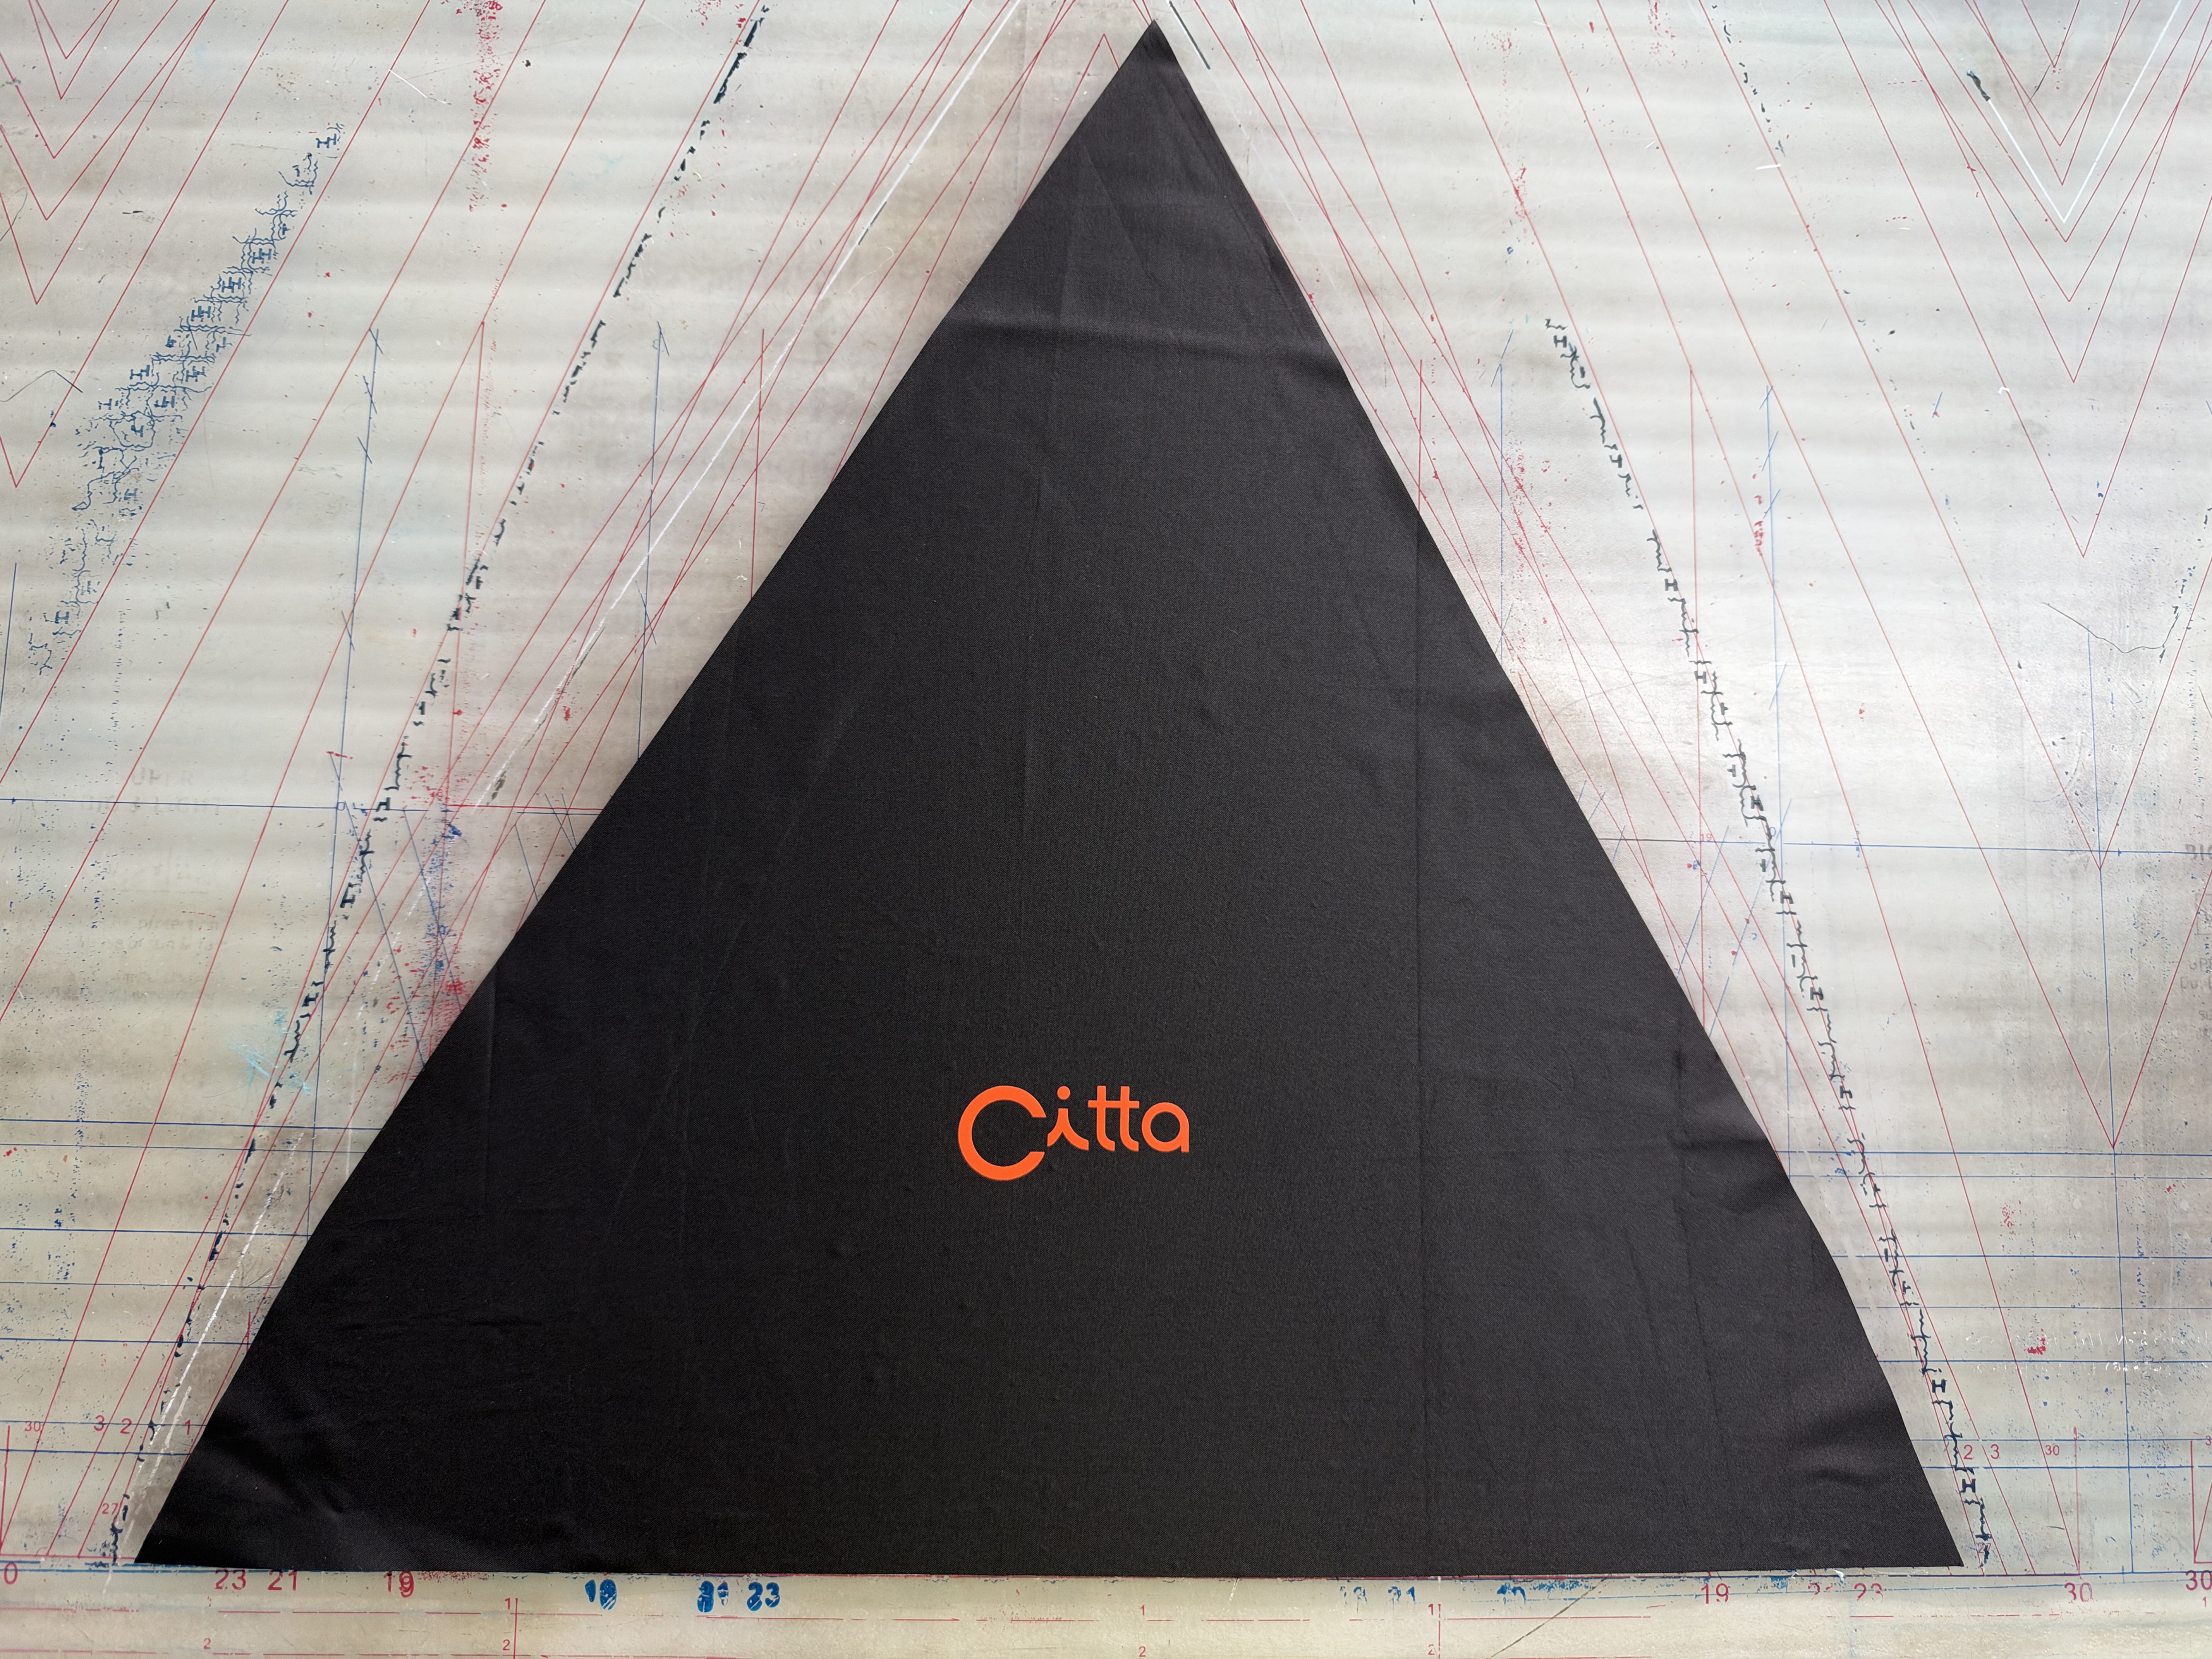
The orange Citta logo appears near the wide edge of the black panel. This view allows checks of the lettering, outline, orientation and position relative to the panel edge.[14]
Screen printing · 06 Examine the logo on a finished umbrella
In the customer-supplied finished-product images, an orange Citta logo appears on one panel of the black canopy. The open views make it easier to assess its orientation and position relative to the panel and canopy edge.[14]
 Angled finished-product view
 Front finished-product view
Paper transfer · 01 Arrange the panel artwork
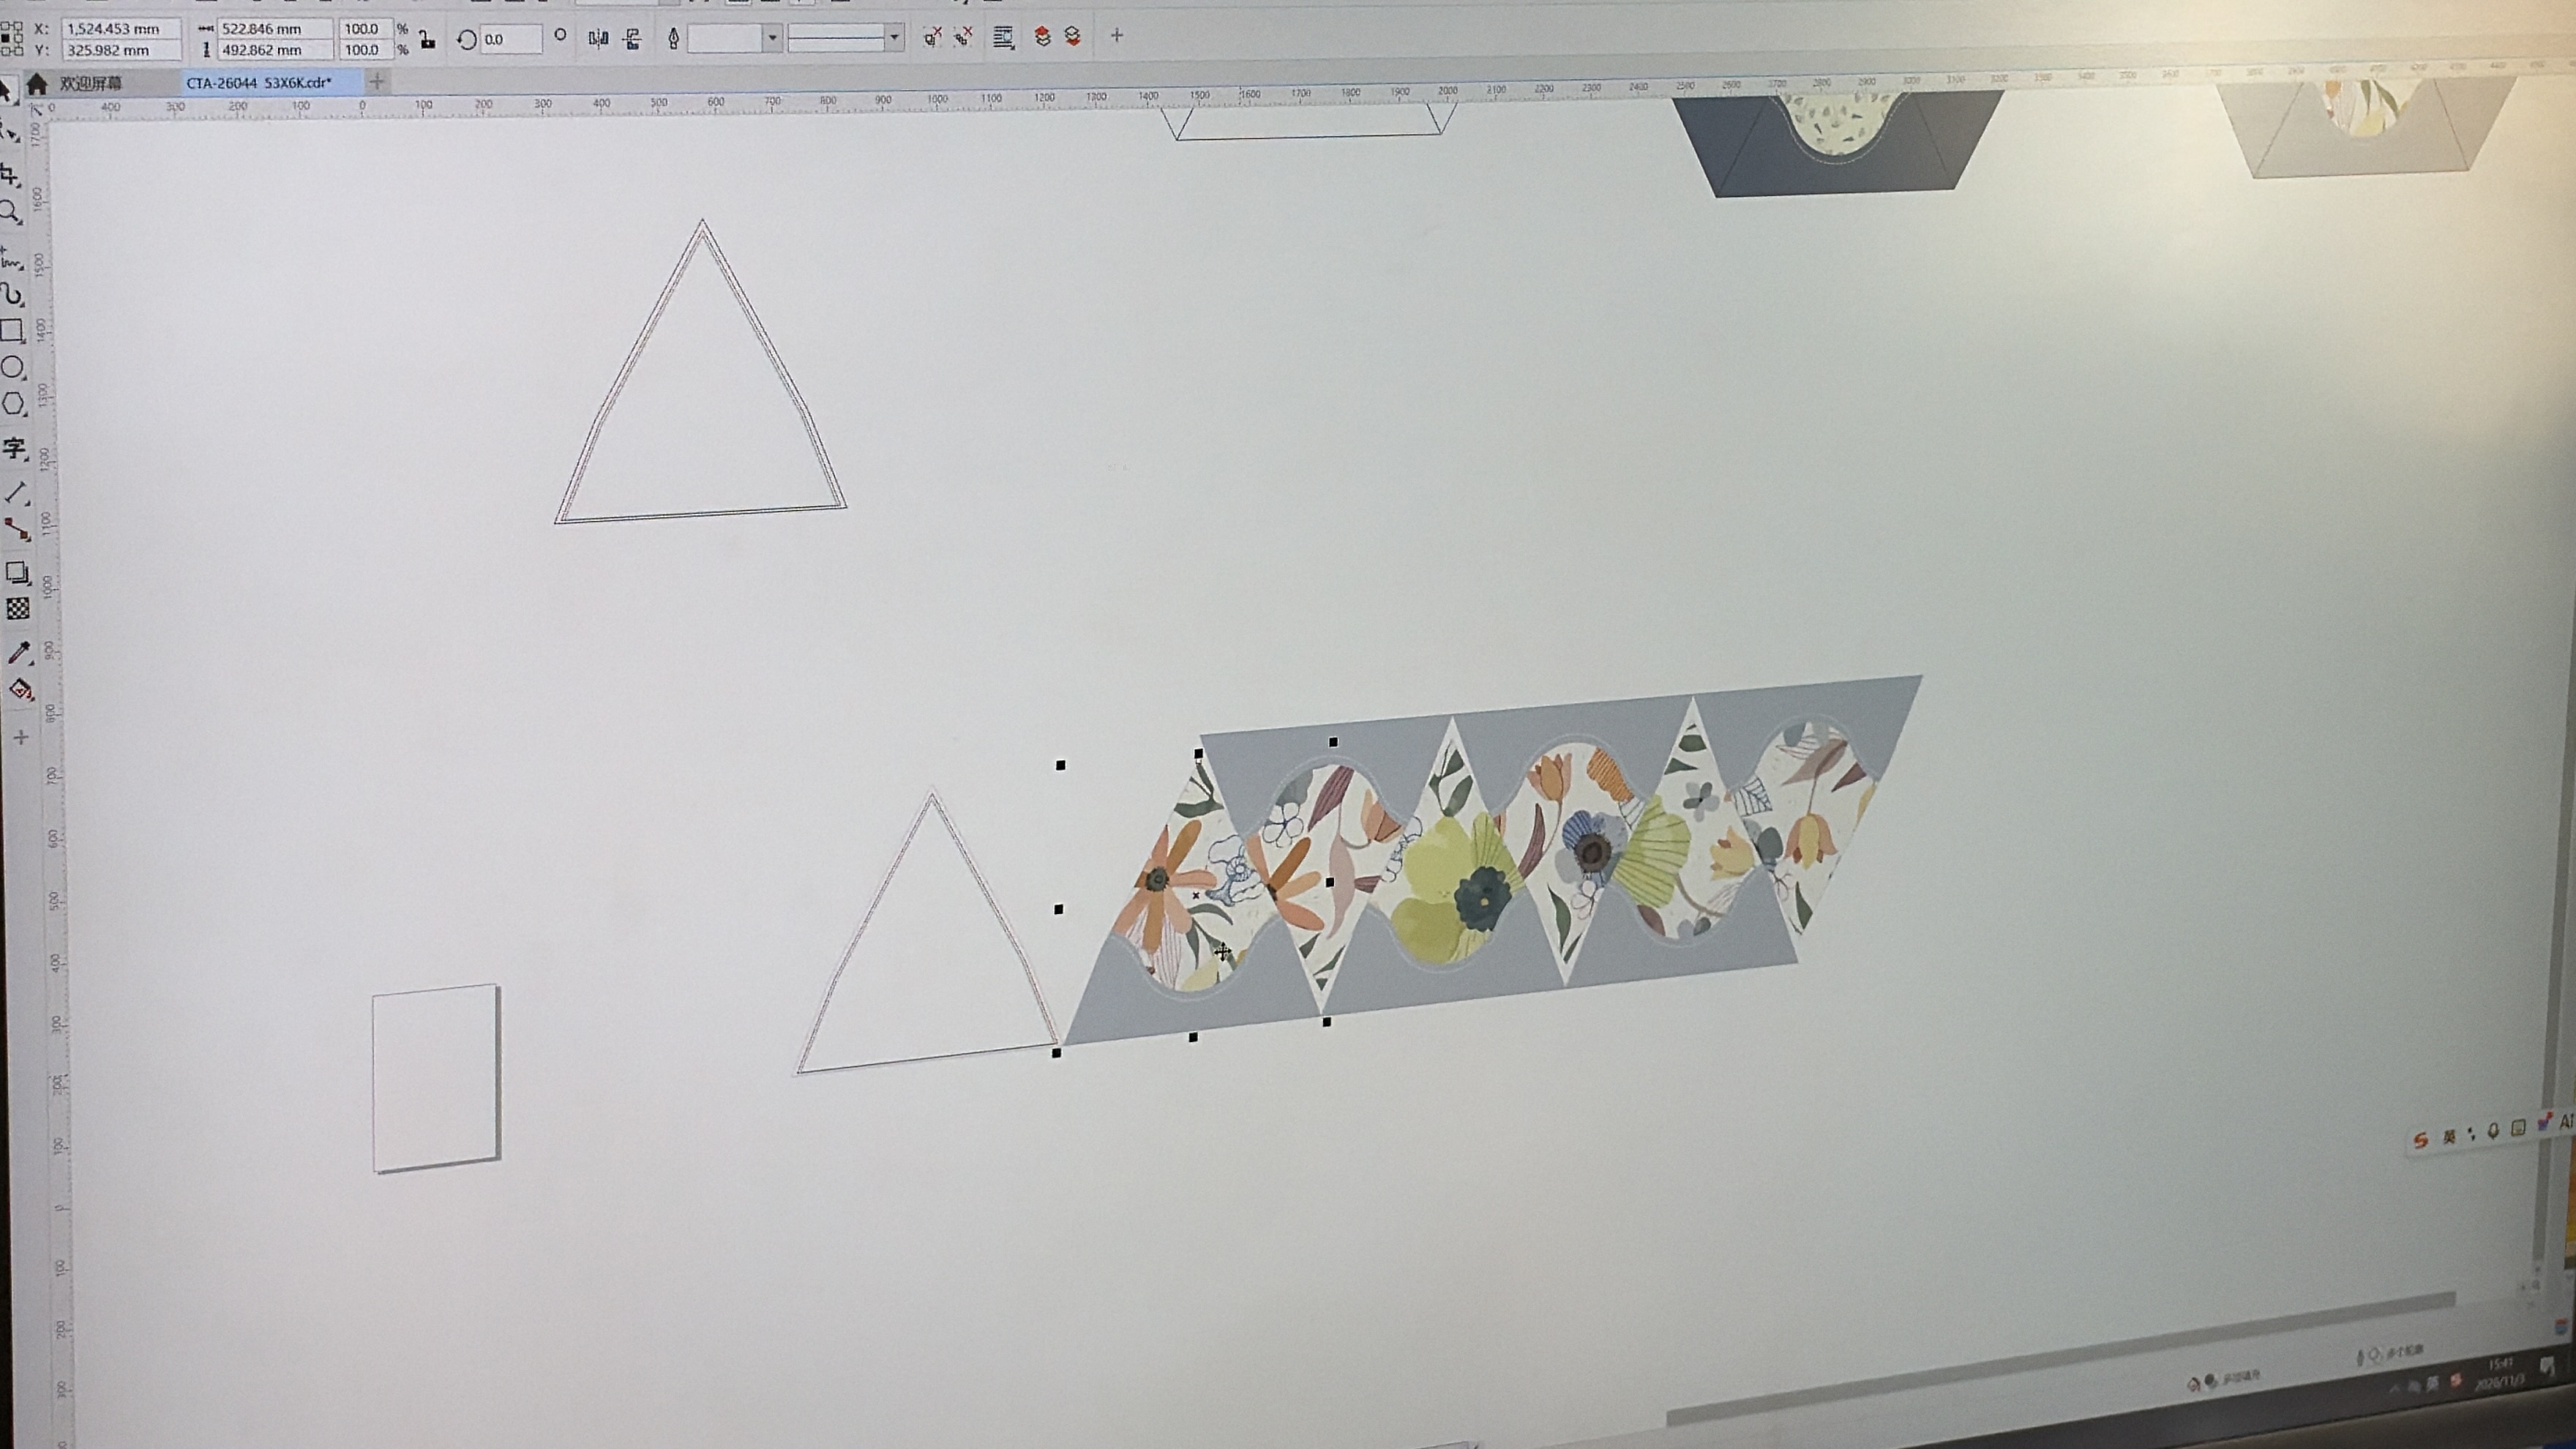
The floral design is arranged across several triangular sections, with panel outlines alongside it. The layout screen helps check the design’s direction, arrangement and relationship to the panel boundaries.[14]
Paper transfer · 02 Print the transfer paper
The printhead outputs the floral design onto a roll of paper. At this stage the paper carries the design; a later transfer step moves it onto the fabric.[14]
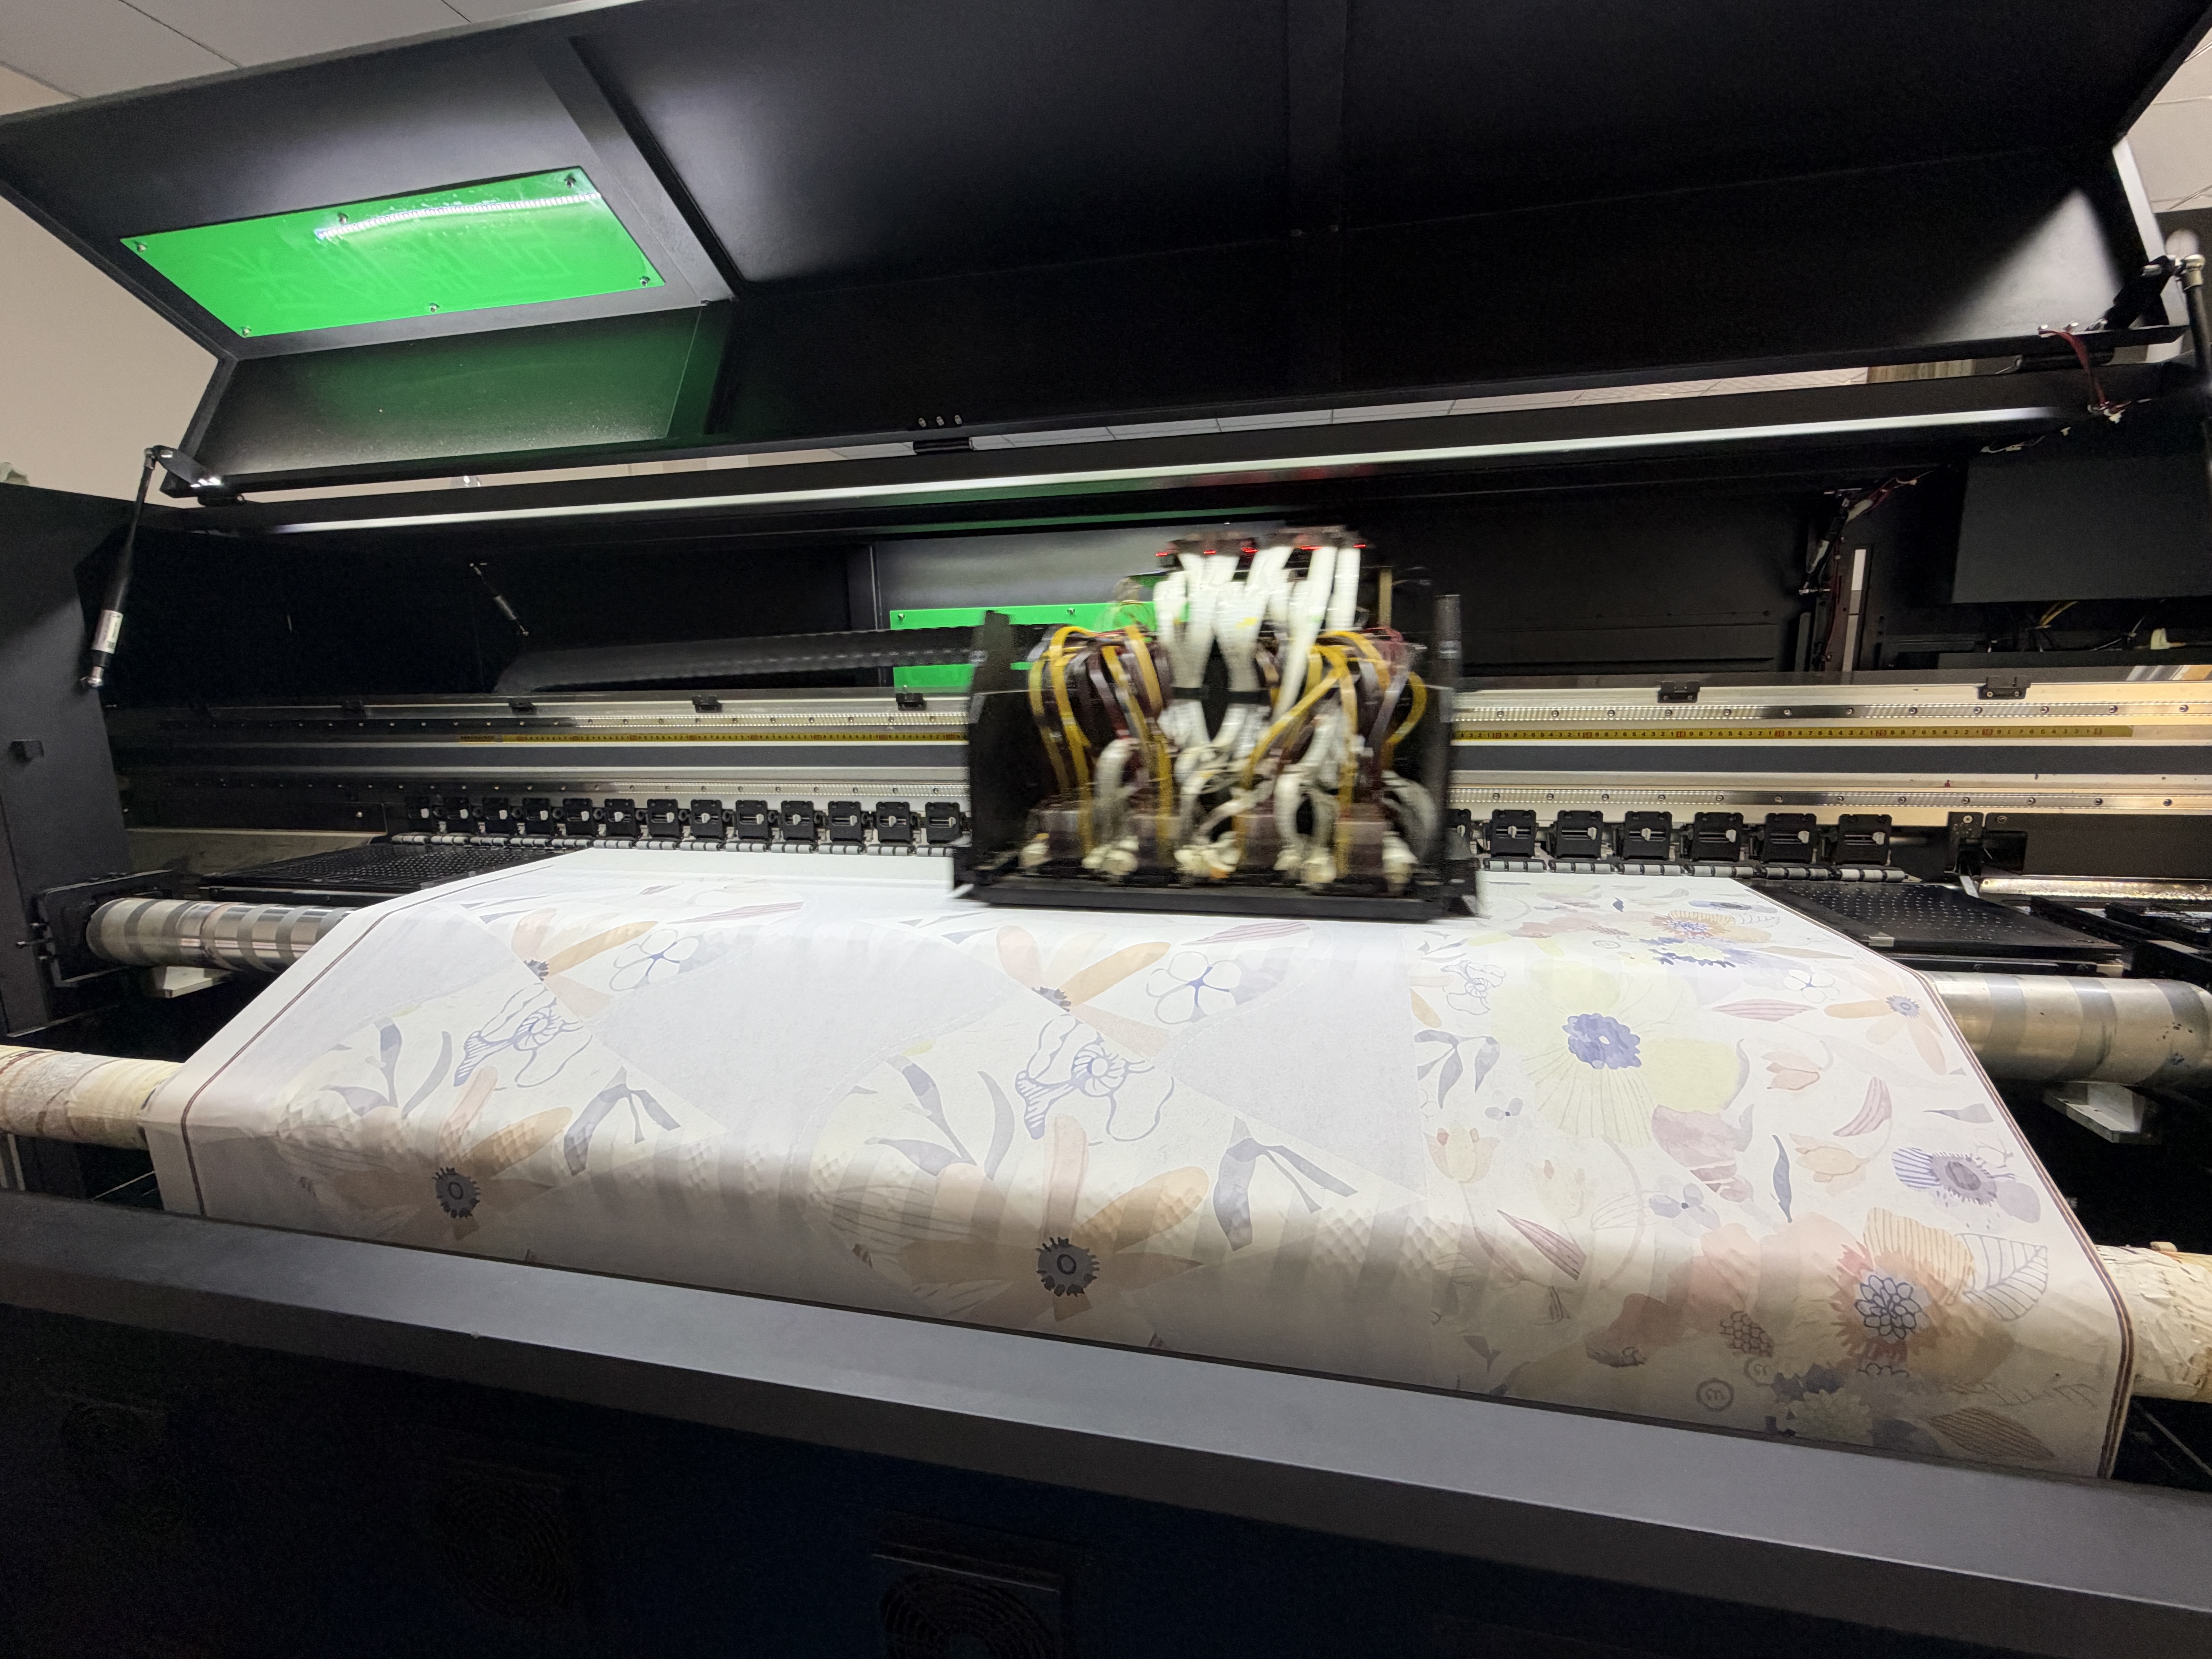
 Original video
Paper transfer · 03 Examine the printed paper
Flowers, blocks of colour and panel areas form a continuous layout on the printed paper. The paper carries the design for transfer; the final fabric colour still needs to be confirmed on the actual printed cloth.[14]
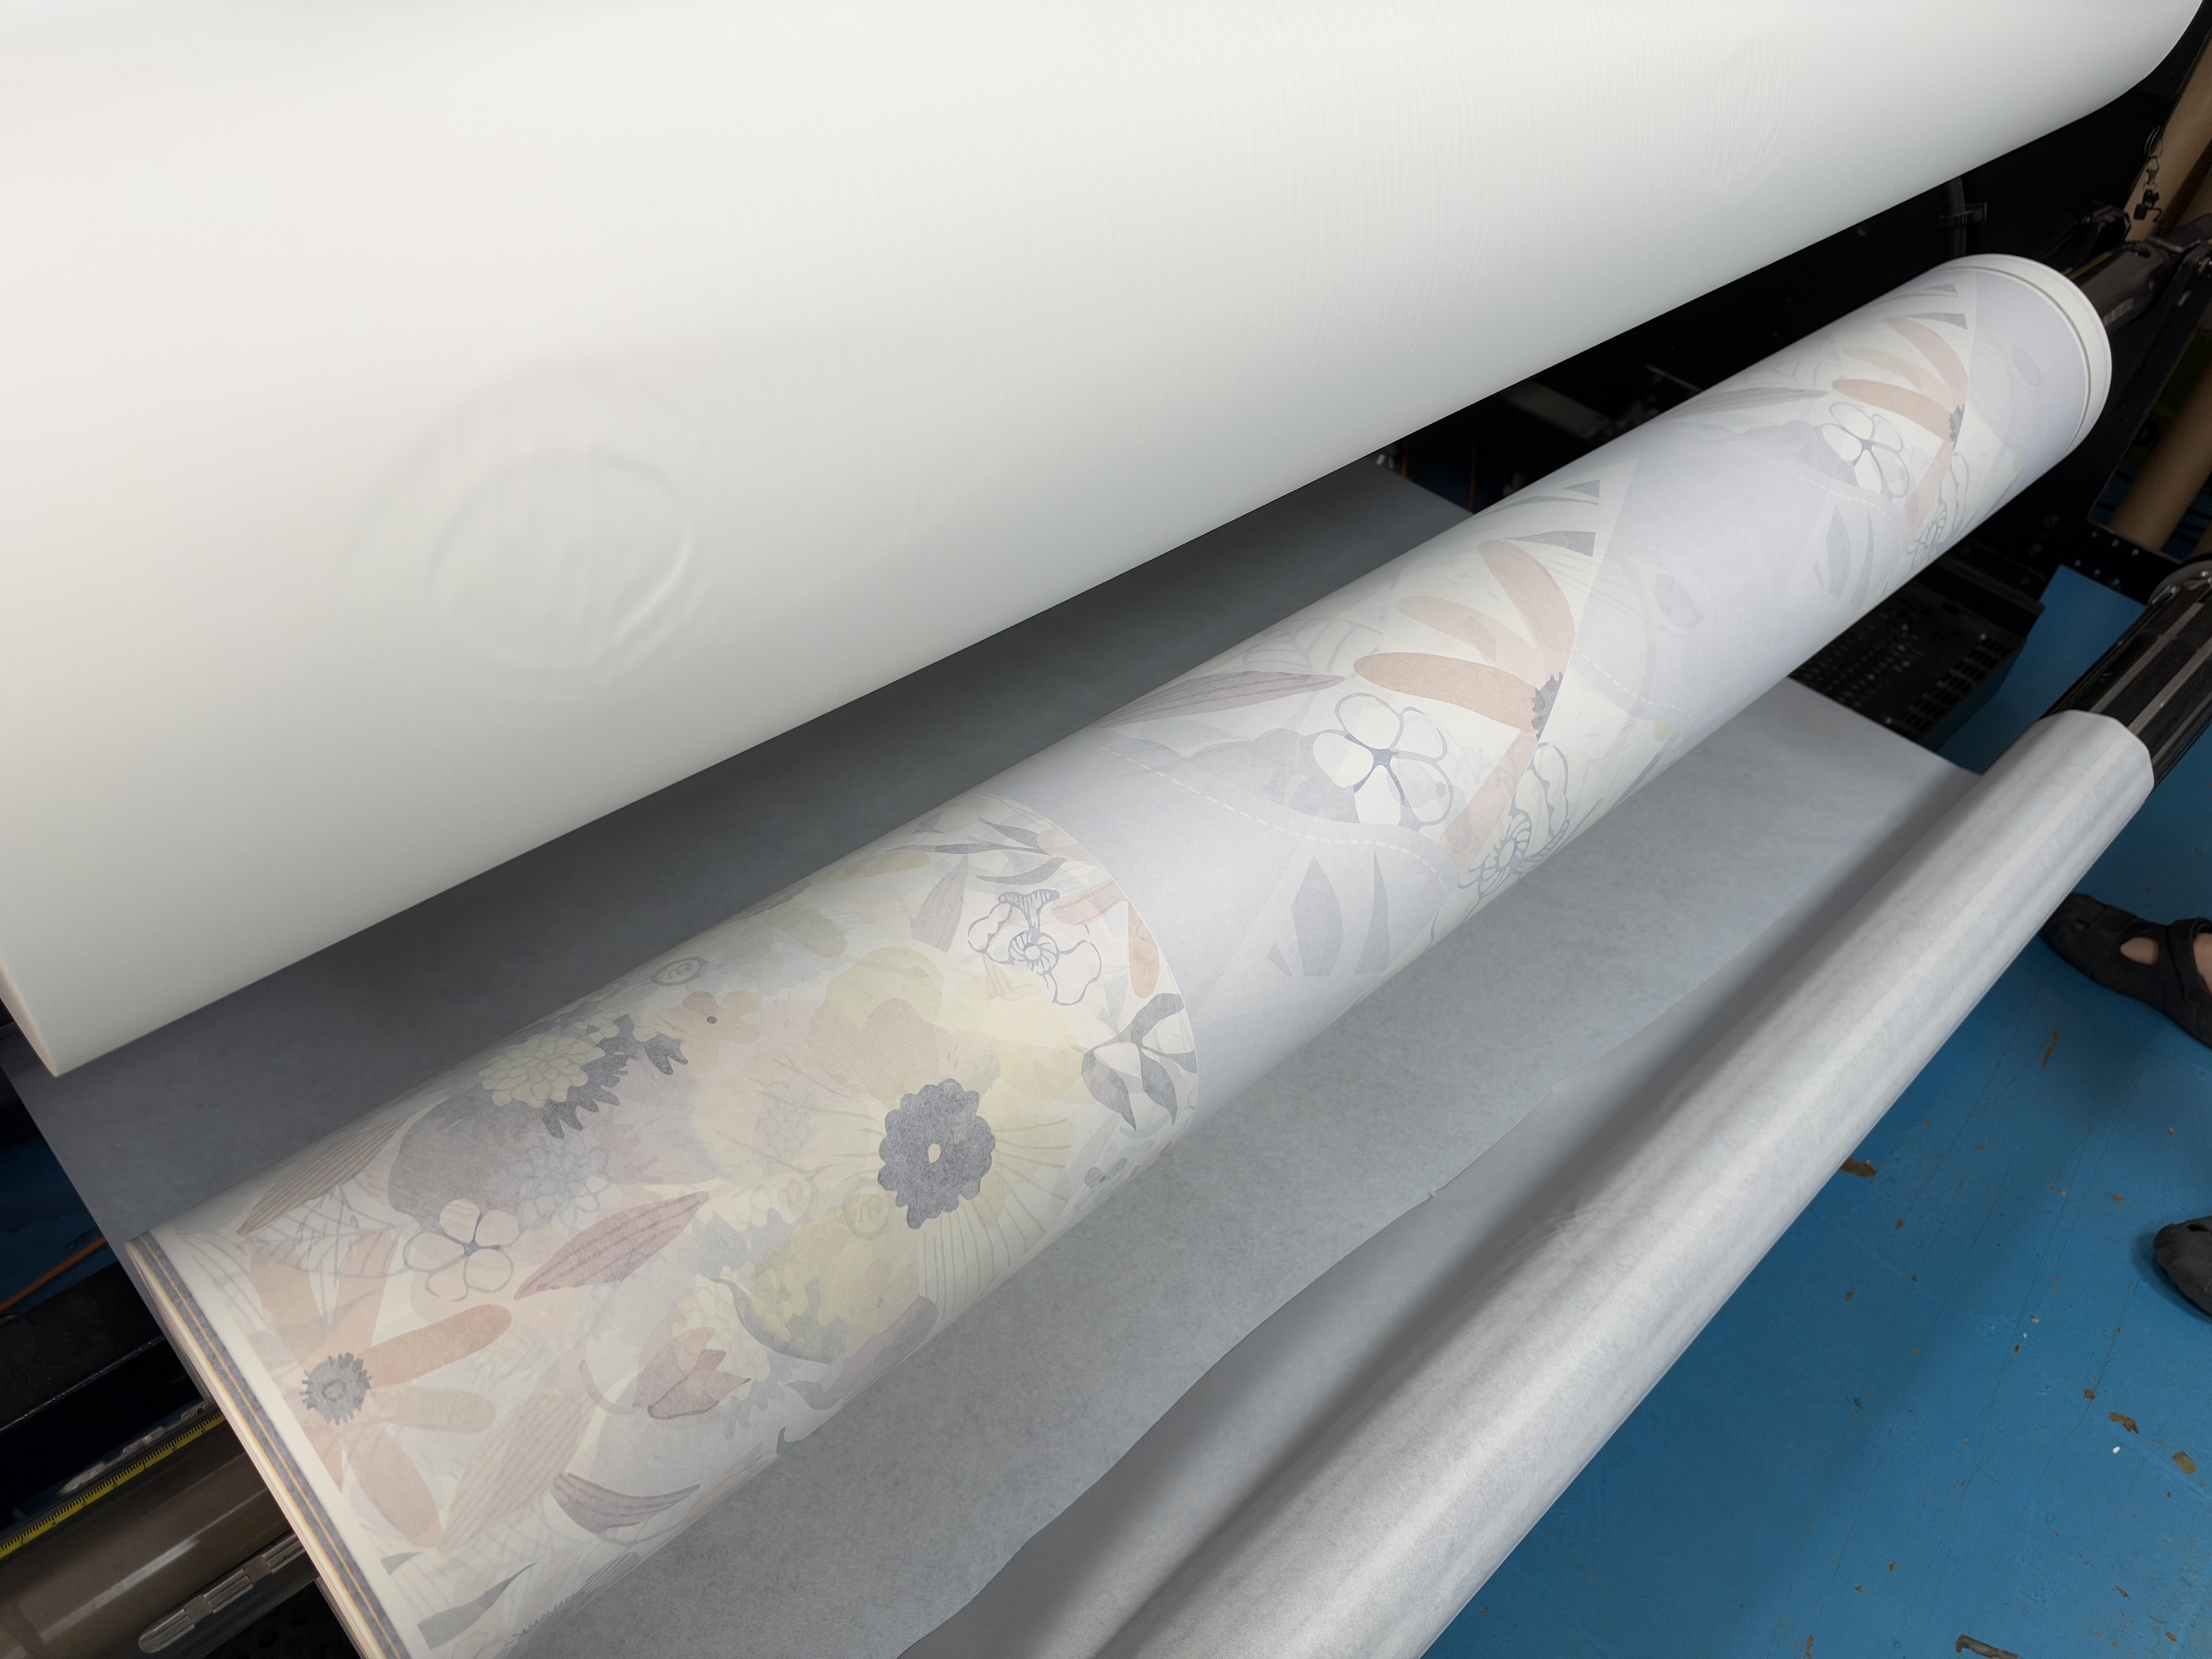
Paper transfer · 04 Smooth and feed the materials into the roller unit
At the machine entrance, the operator smooths the materials and guides the paper and fabric towards the rollers. This view shows where the paper and fabric enter the transfer stage.[14]
 Original video
Paper transfer · 05 Separate the paper from the fabric
At the machine outlet, the operator lifts the upper paper layer away from the floral fabric beneath it. Both the paper and the fabric carrying the design are visible during separation.[14]
 Original video
Paper transfer · 06 Examine the transferred floral design
The transferred fabric shows the flowers, colour blocks and panel layout. Compare it with the relevant artwork to check arrangement, direction and required detail. Then use the cut panels and complete sample umbrella to confirm the final layout.[14]
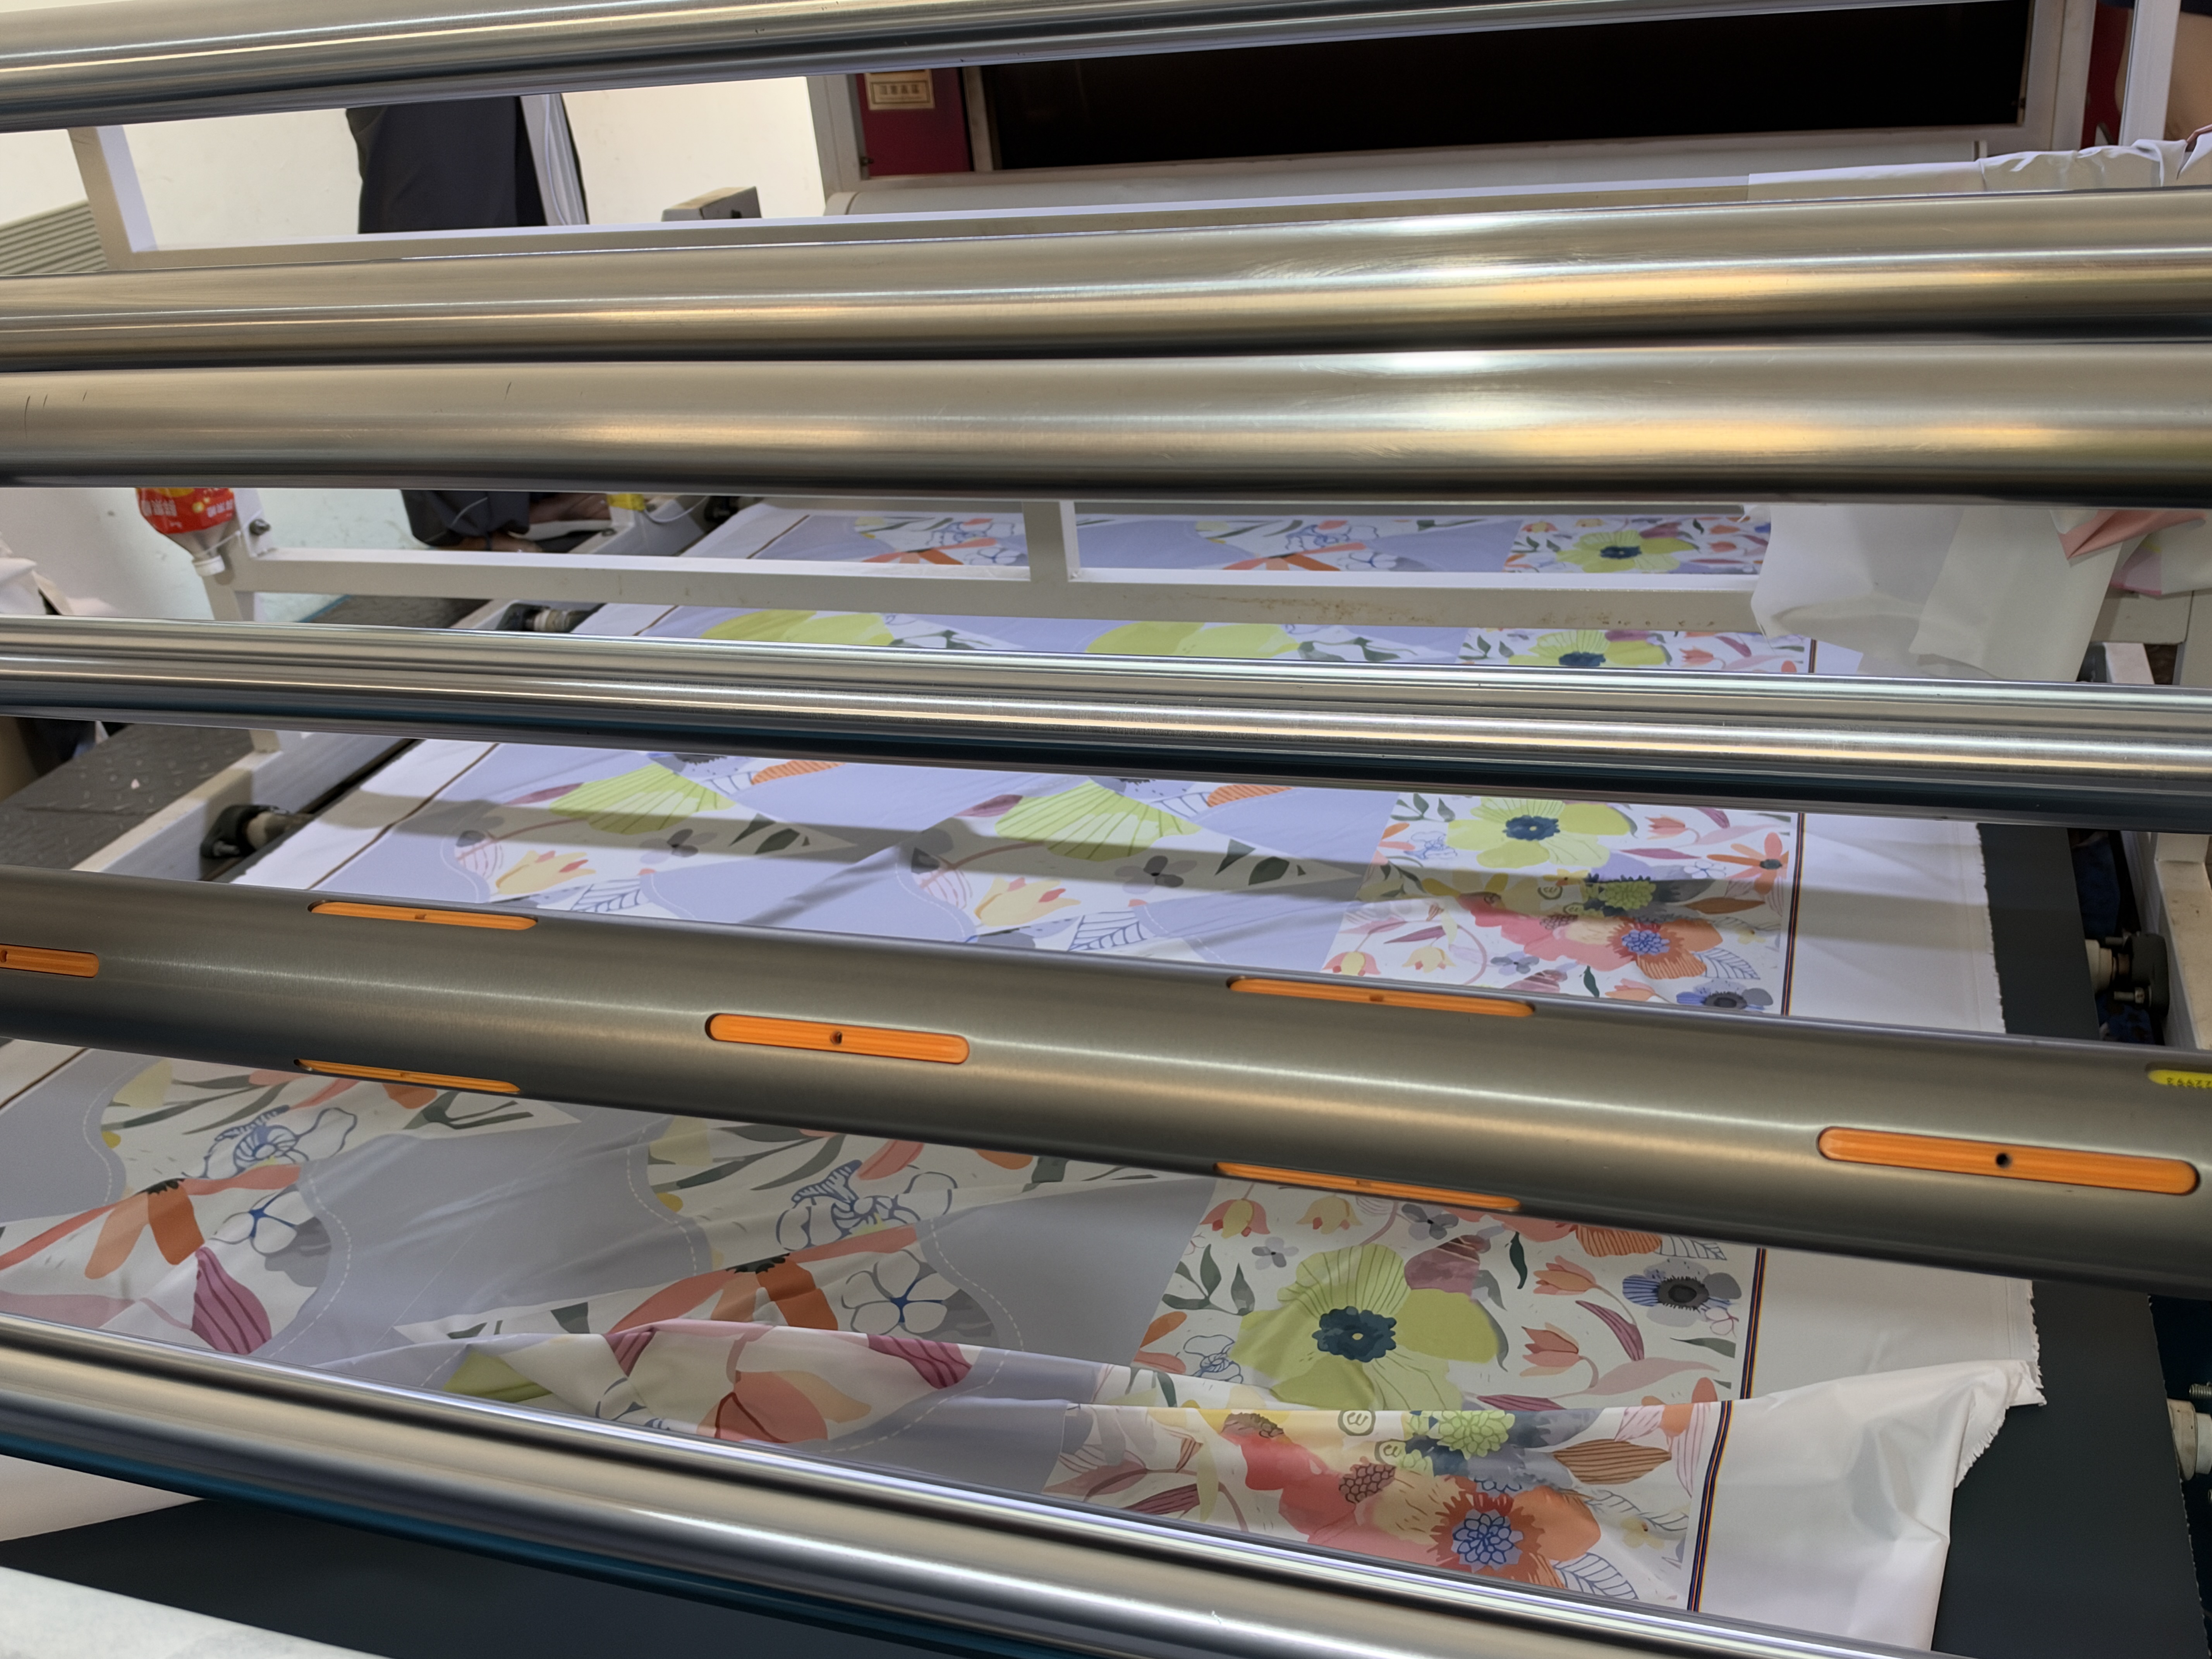 Floral fabric at the machine outlet
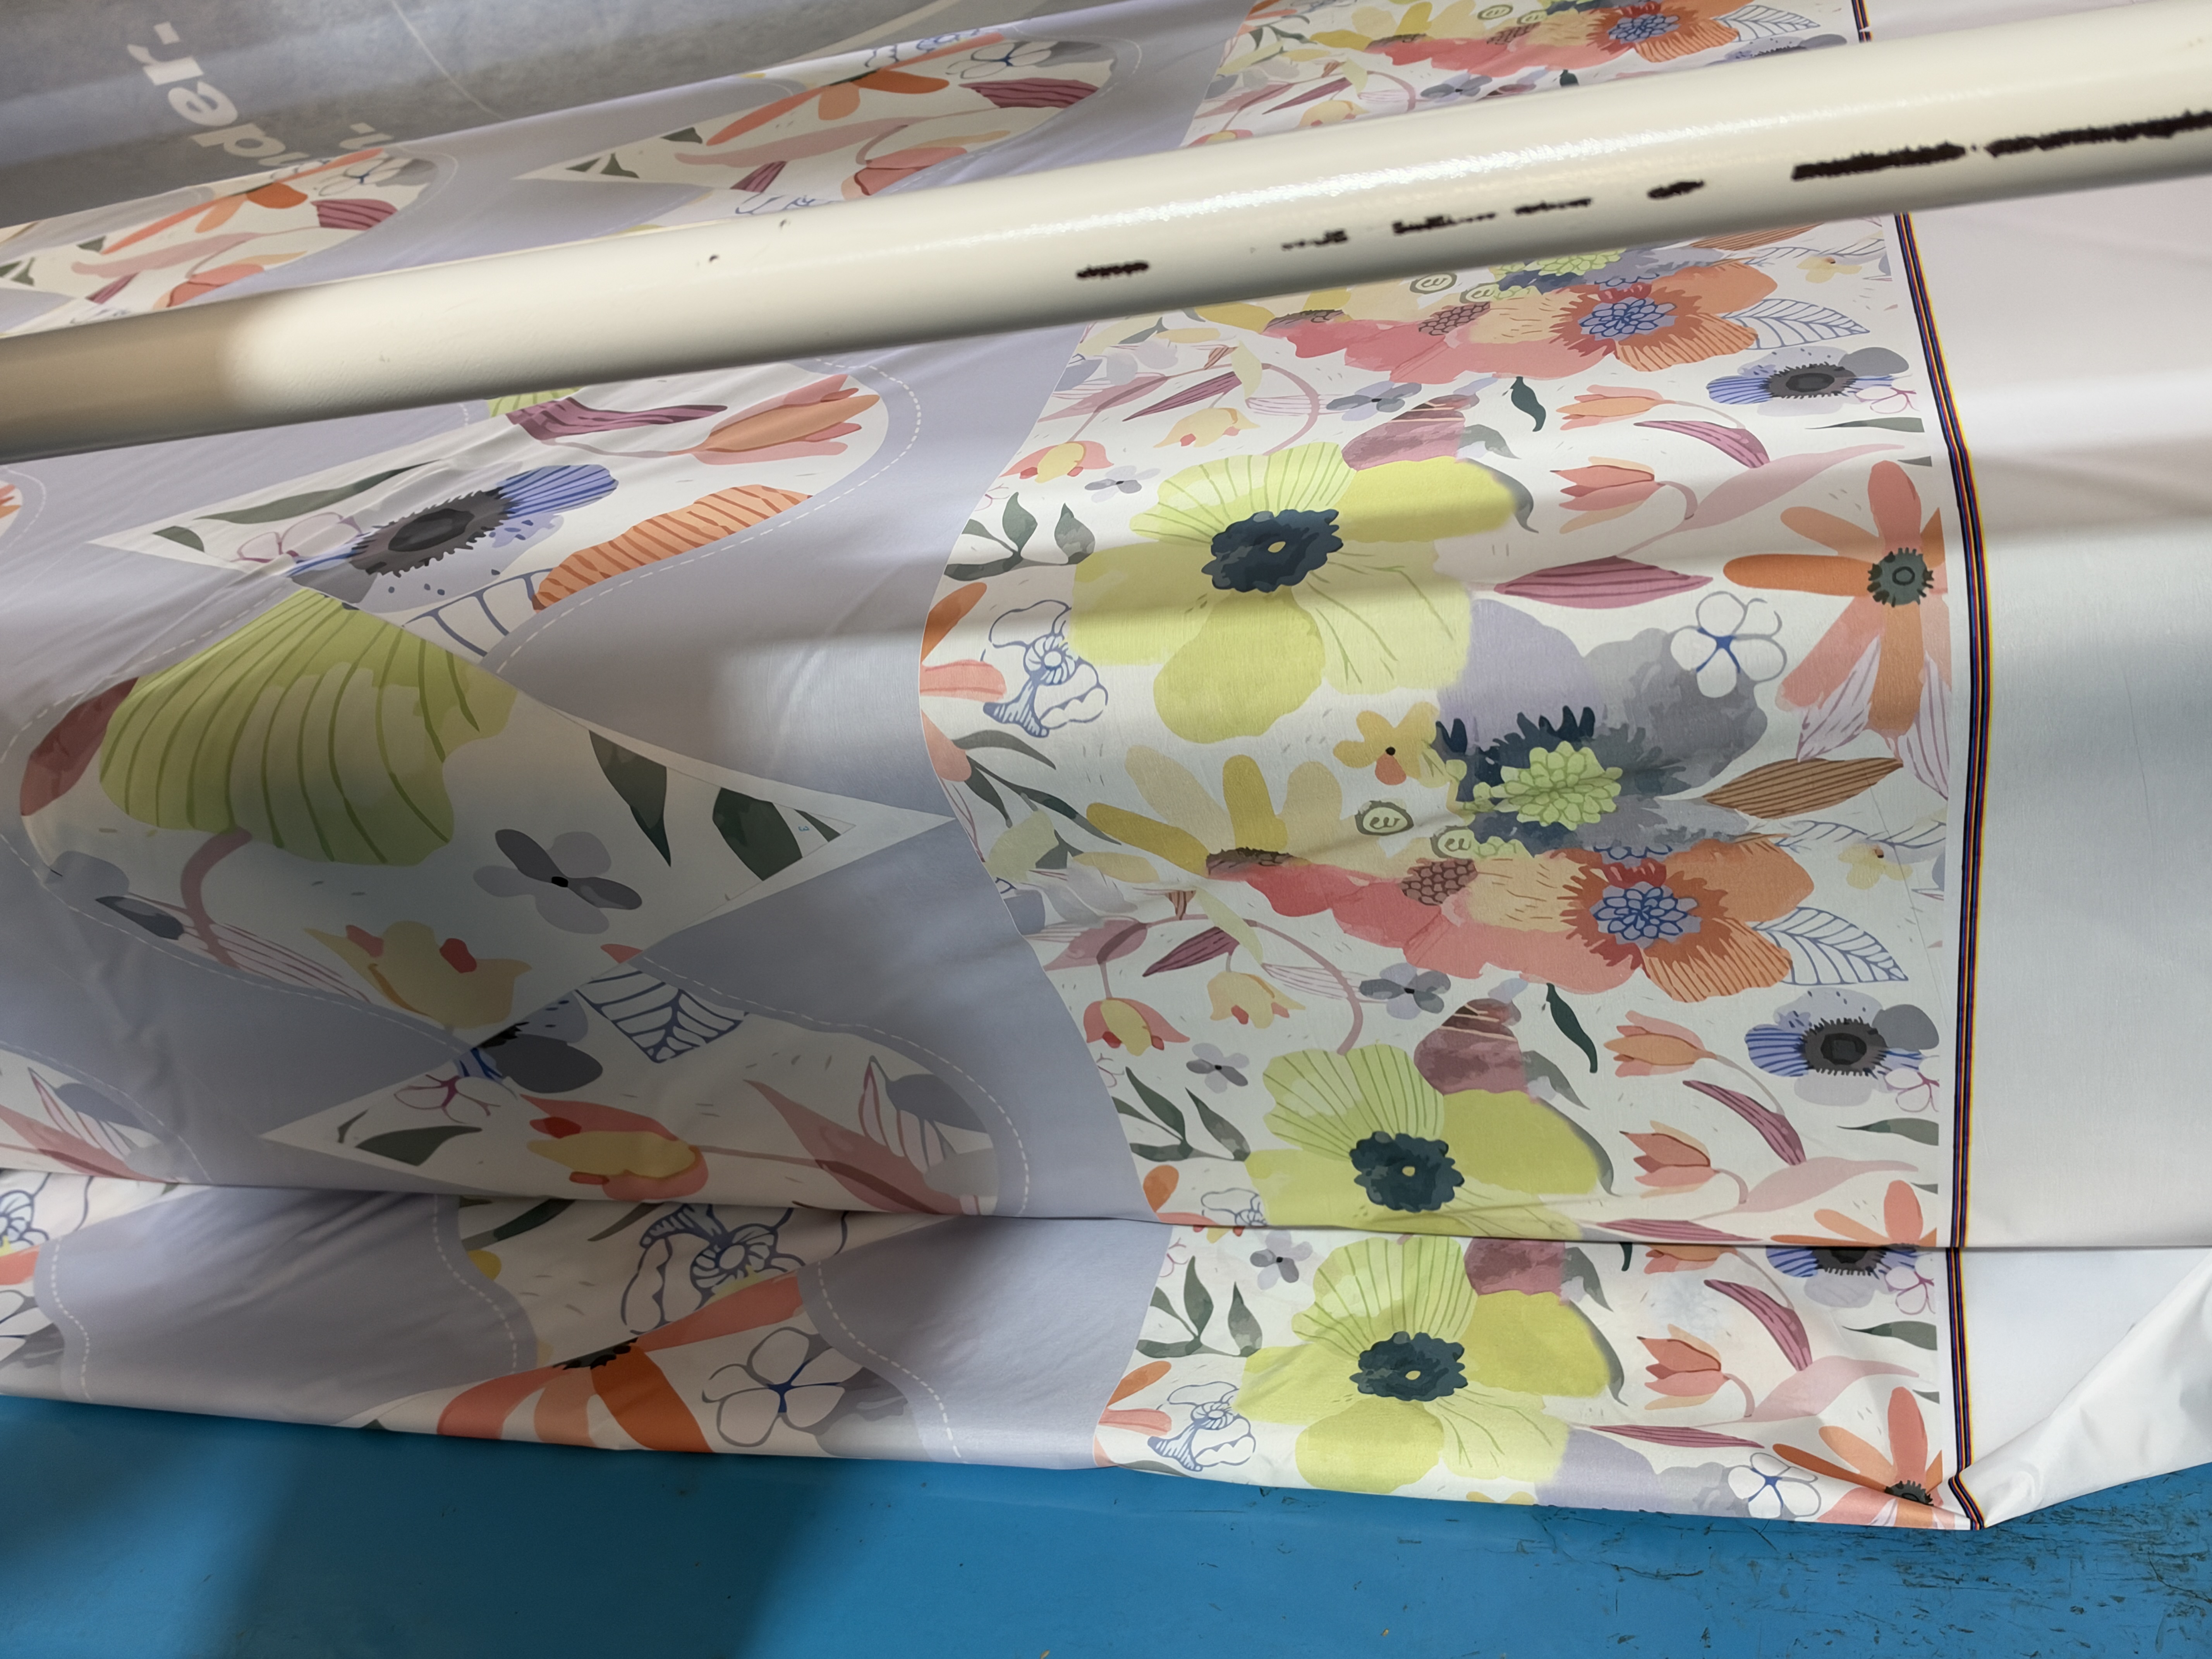 Printed fabric and design detail
Paper transfer · 07 Examine the finished-product views
The open view shows the floral design across the canopy. The storage view shows the floral pattern on the outer sleeve, with the umbrella inside. Check the design direction, position and coordination on the canopy and sleeve separately.[14]
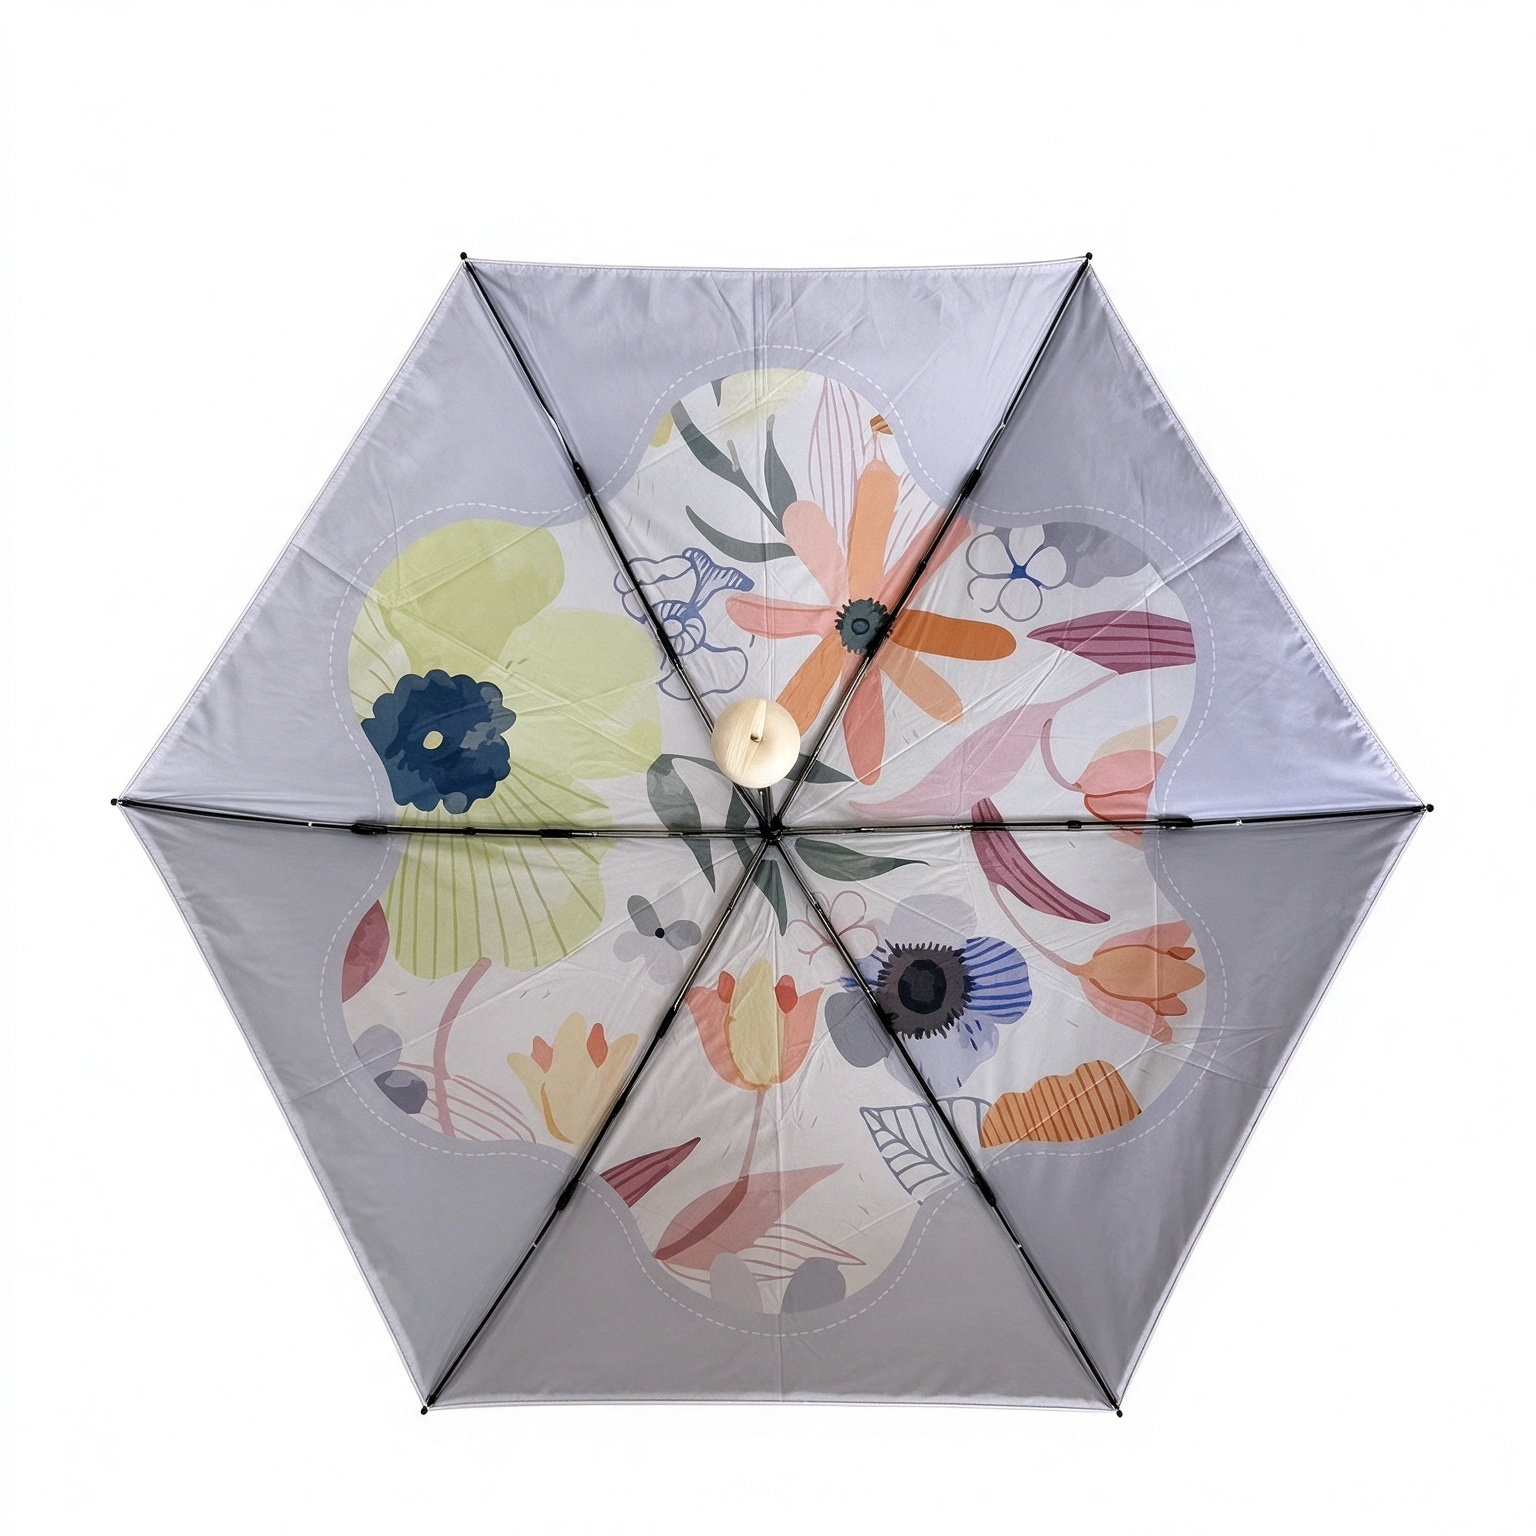 Open floral umbrella
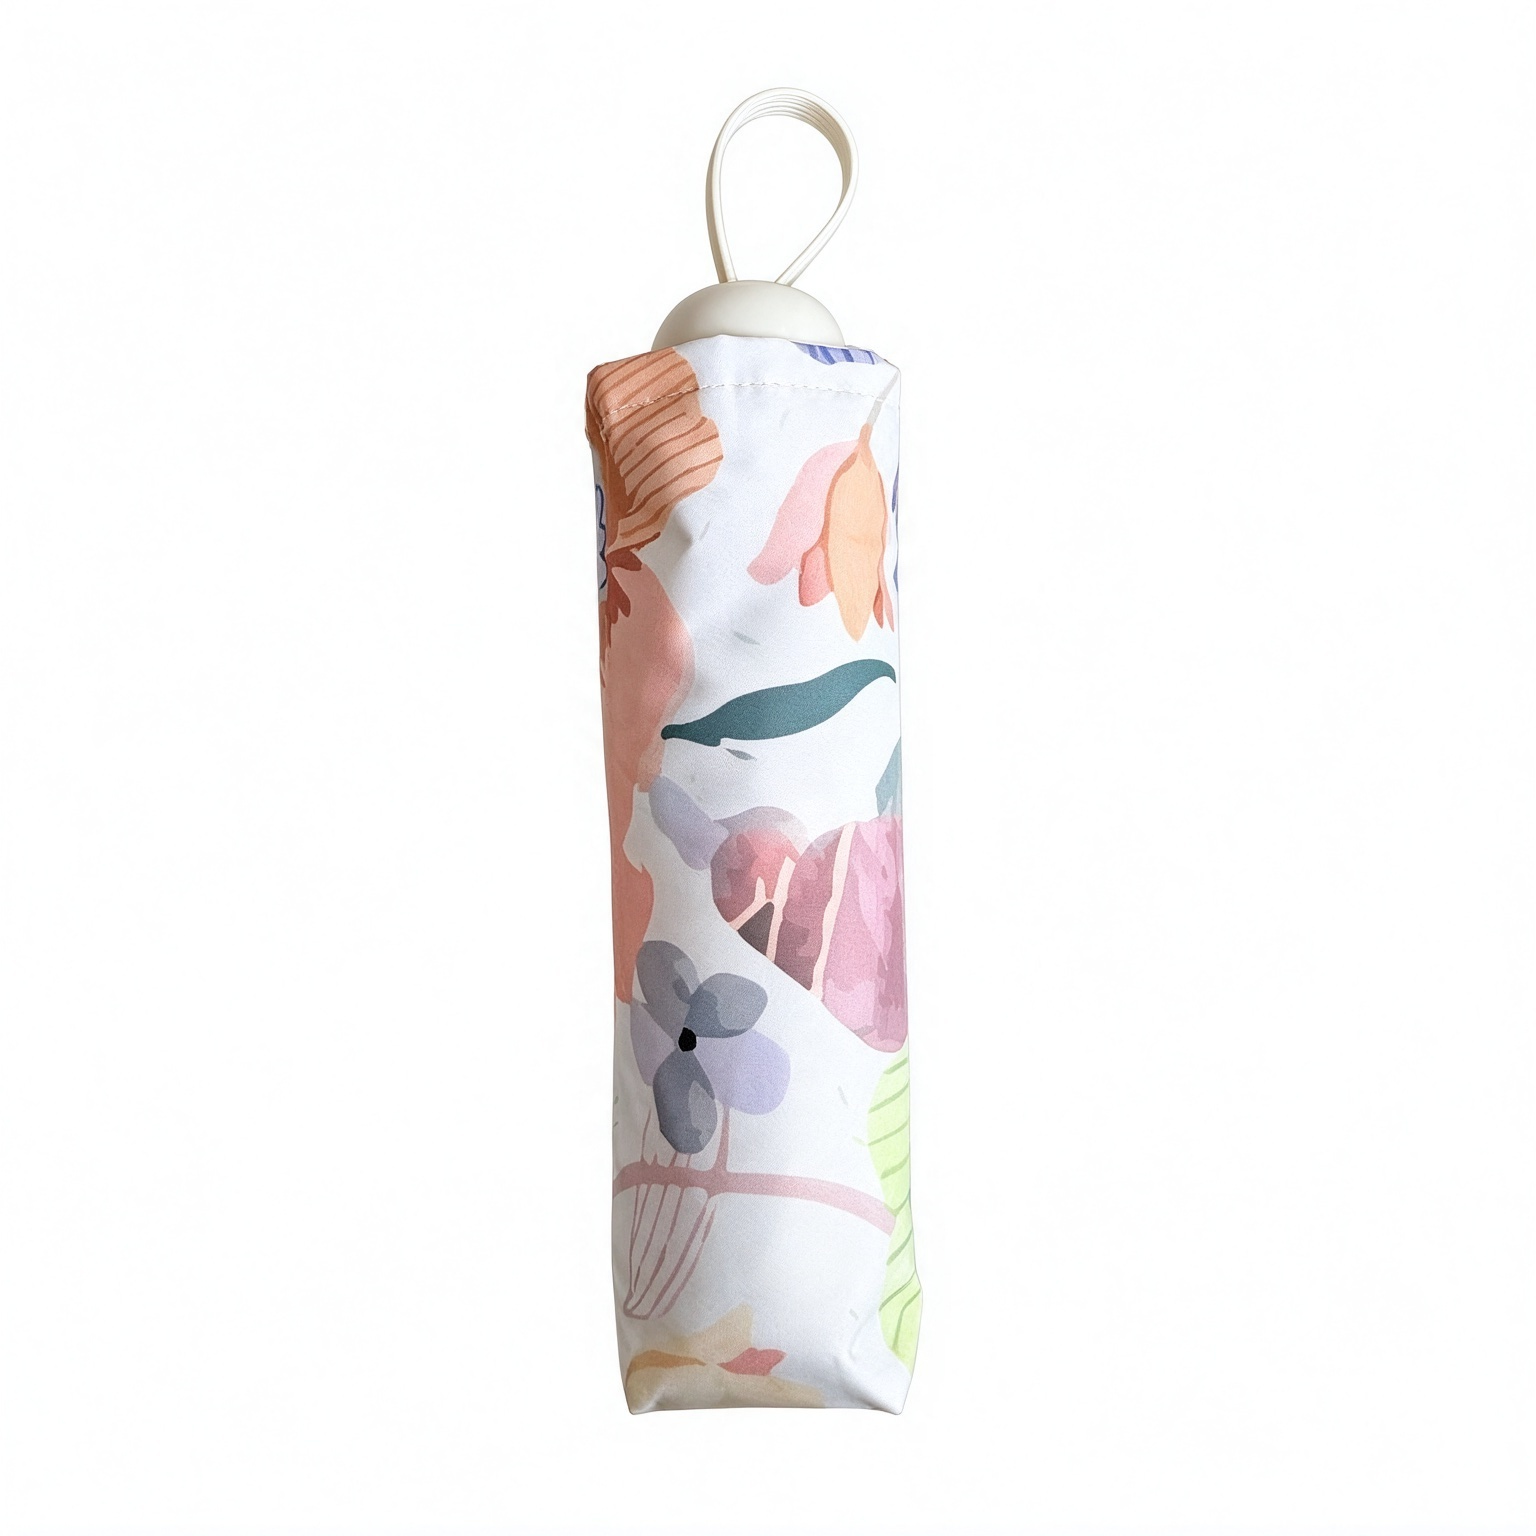 Umbrella stored inside its sleeve
Match project records to the order configuration
Process photographs, artwork and finished-product images serve different purposes. For a particular project, link the model, actual fabric, artwork revision and sample records before confirming the order configuration. CITTA’s separate case study of 16,000 custom carbon-fibre umbrellas used 210T black-coated fabric and digital printing, rather than the configuration then shown for the base model. The order requirements still need to be specified separately.[10][12]
4. All-over, cross-panel and two-sided printing describe different layouts
All-over describes how much of the canopy a design covers. Cross-panel describes whether the design continues across seams between adjacent panels. Two-sided describes printing on the inside and outside. A design may combine these requirements or use them separately. Two-sided printing does not, by itself, mean that the canopy has two layers.
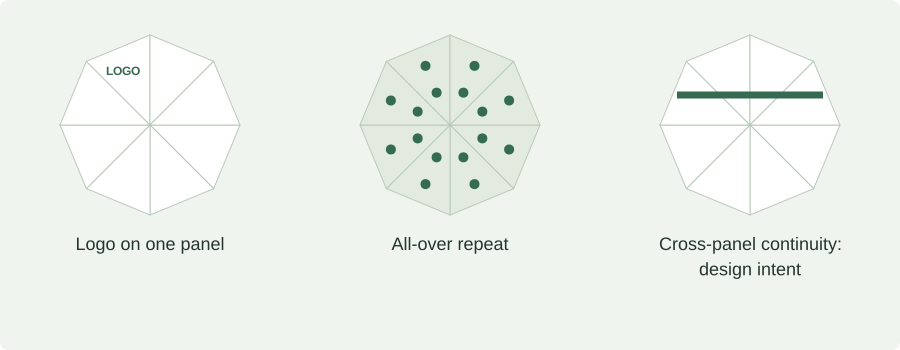
A small repeated motif can cover the canopy without every repeat matching at a seam. A line spanning two panels, however, makes any mismatch at the seam visible. When specifying all-over printing, identify which lines or shapes must align across panels and which may be interrupted by seams.
The canopy takes shape when its cut panels are sewn together. Important text or logos near seams, the canopy top or the edge need to be checked against the template for the actual model. Bleed extends the artwork beyond the intended cutting boundary. Seam allowance reserves fabric for joining panels. The safe area provides space for important text and logos, reducing the risk that cutting or seams will interfere with them. Use the approved model-specific template for these areas and registration tolerances; a generic fan-shaped diagram is not a substitute.
Digital artwork shows how flat panels relate to one another. An open umbrella shows the curved surface, viewing direction and seams. For cross-panel designs, check both the template positions and the assembled umbrella. Check the orientation of text on the inside and outside separately.
5. What to approve in artwork and proofs
A sampling brief needs to connect the design with a specific product configuration. CITTA’s custom umbrella page lists vector logos, print positions, colour references and sample approval among the required inputs.[11] The following five checks help organise the artwork package.
- Model and fabric: identify the actual model, fabric, background colour and relevant coatings or finishes. Do not use the base model description in place of the order configuration.
- Artwork files: provide editable vector artwork for logos where possible. For photographs and other raster images, check effective resolution at the final print size. A file extension or a generic DPI figure does not guarantee detail.
- Position and dimensions: identify the inside or outside, the panel, artwork width and height, orientation and relationship to seams or the canopy edge. Supply the corresponding template for cross-panel designs.
- Colour reference: name the colour-reference system, physical reference or approved sample, and agree how physical colour will be assessed.
- Revision and approval scope: give artwork and proofs a revision identifier. State whether the approval covers layout, colour, detail or the complete configuration. Keep the latest approval record after any change.
A screen emits light; a print is seen by light reflected from its material. Equipment, colour management and viewing conditions all affect the colour seen.[7][8] A digital mock-up is useful for composition, dimensions and position, but it cannot establish that the fabric colour meets the requirement. For a brand’s key colour or consistency between batches, specify the physical reference and assessment conditions.
| Approval item | What it establishes | What still needs separate confirmation |
|---|---|---|
| Digital proof | Model, artwork revision, layout, orientation, dimensions and colour annotations | Actual fabric colour, detail and compatibility with the material |
| Print sample on the specified fabric | Colour, edges, small lettering, tonal range and surface appearance | Seam alignment, orientation on the assembled umbrella and the complete configuration |
| Complete sample umbrella | Inside and outside designs, seams and appearance when open and closed | Specified performance requirements and the corresponding test results |
A fabric print sample and a complete umbrella answer different questions. If colour has been approved on a swatch but the umbrella sample uses a different fabric or background colour, that colour approval needs to be revisited. Even a change limited to logo position should be clearly marked in the new revision, so production does not mix up files.
6. How to inspect physical samples
Inspect the physical sample alongside the approved artwork and colour reference. Record the model, fabric, artwork revision and inspection conditions. Photographs are useful records, but lighting and screen display also affect the colour seen; they cannot replace physical approval under agreed conditions.[7][8]
Colour, edges and detail
Compare the sample with the colour reference under agreed, consistent lighting. Check whether solid areas provide the required opacity, whether spaces in lettering and fine lines remain clear, and whether gradients retain the required tonal range. Use the same artwork dimensions and comparable materials when comparing samples, so that design or fabric differences are not mistaken for differences between printing methods.
Open, closed, inside and outside
Open the sample umbrella and check logo orientation, its relationship to the canopy edge and alignment across panels. View it from the intended viewing direction to judge legibility. Inspect both sides of a two-sided design. Once closed, check any branding positions included in the order, such as the fastening strap, sleeve or label, against the approved configuration.
Record appearance approval separately from durability testing
Correct colour and placement do not establish resistance to rubbing, weathering or other stresses. AATCC TM8, for example, evaluates colour transferred from textiles to other surfaces under dry and wet rubbing. It is a colourfastness-to-crocking assessment, and its public summary also notes that some very small print areas are unsuitable for the method.[9]
If an order requires rubbing resistance, transfer-layer adhesion or outdoor durability, specify the object assessed, test method, conditions and acceptance criteria for each requirement. A visual inspection or one rubbing test cannot replace other performance tests, nor establish the complete umbrella’s rain or sun protection.
A printing specification needs to connect artwork, actual fabric and the complete sample umbrella. Process names explain how the design is produced; approval records establish the configuration selected for the order and the scope of that approval. For a custom project, provide the model, fabric, artwork, quantity and colour reference so the discussion can focus on the actual sample.
Sources and references
[1] FESPA Africa · Screen Printing
Screen, stencil and squeegee principles.
[2] Epson · Primer: 3 Methods of Digital Textile Printing
Digital textile-printing routes, transfer sublimation and the compatible materials discussed by Epson.
[3] Mimaki · Tx300P-1800B: Features
Direct sublimation, ink, fabric and finishing routes; historical equipment documentation.
[4] Epson · SureColor F1070: Can I print on a polyester garment?
DTFilm using film, hot-melt adhesive powder and heat pressing, used here to distinguish transfer mechanisms.
[5] SAATI · Rotary Textile Printing
Fine-line and halftone applications for rotary textile screen materials.
[6] Siser · P.S. Film Extra / EasyWeed Extra
Compatibility of specified adhesive-transfer materials.
[7] Adobe · Color management in Photoshop on desktop
Screens, output devices and colour management.
[8] Datacolor · What You Need to Know About Light Sources and Color Evaluation
Lighting and conditions for colour assessment.
[9] AATCC · TM8-2016e(2022)e: Colorfastness to Crocking: Crockmeter
Public summary: dry/wet rubbing colourfastness and specimen applicability.
[10] CITTA · Case study: 16,000 custom carbon-fibre umbrellas
Actual order configuration and photographs from the separate case study.
[11] CITTA · Custom umbrellas, artwork and sample approval
Existing project inputs and process photographs.
[12] CITTA · Umbrella Fabric Explained: Denier, Thread Density and GSM
Fabric specifications and the relationship between base-model and order configurations.
[13] Adobe · How to create halftone effects
Using halftone dots to reproduce tonal changes.
[14] CITTA · Original printing-process and sample records
Received on 5 November 2026: original photographs, artwork screens and operating videos in screen-printing and digital-printing groups. Used to illustrate visible operations and layouts.
Sourcing UV-Protective Umbrellas: Specifications, Test Reports and Sample Approval →